In her previous article, Deb wrote about why she samples. It all began with her incredible shrinking scarf, which forever changed her approach to sampling. Read more about the whys of sampling in part one and then enjoy part two, which has more specifics on how to sample. Here's Deb:
In the previous article, I wrote about why I sample. Here are more details of what I explore while sampling:
Weave Structure
During sampling, I test my draft to make sure it is correct, the proportions are pleasing, and the weave structure works with the yarns and sett I have selected.
Many structures, such as fancy twills, overshot, monk’s belt, and huck lace, use floats to create pattern. Sampling lets me test fabric stability, float distribution, and float length for those structures. For example, an overshot pattern float that goes over 10 ends will be a half-inch float at 20 epi but a full inch at 10 epi. Some yarns don’t have the body to float that far without sagging.
Sett
The right sett is critical in creating fabric with the appropriate feel and drape. On any given draft, more ends per inch or picks per inch results in a firmer hand to the fabric. The plaid fabrics in the photo below show the difference sett makes in a fabric’s characteristics, and how it might best be used.
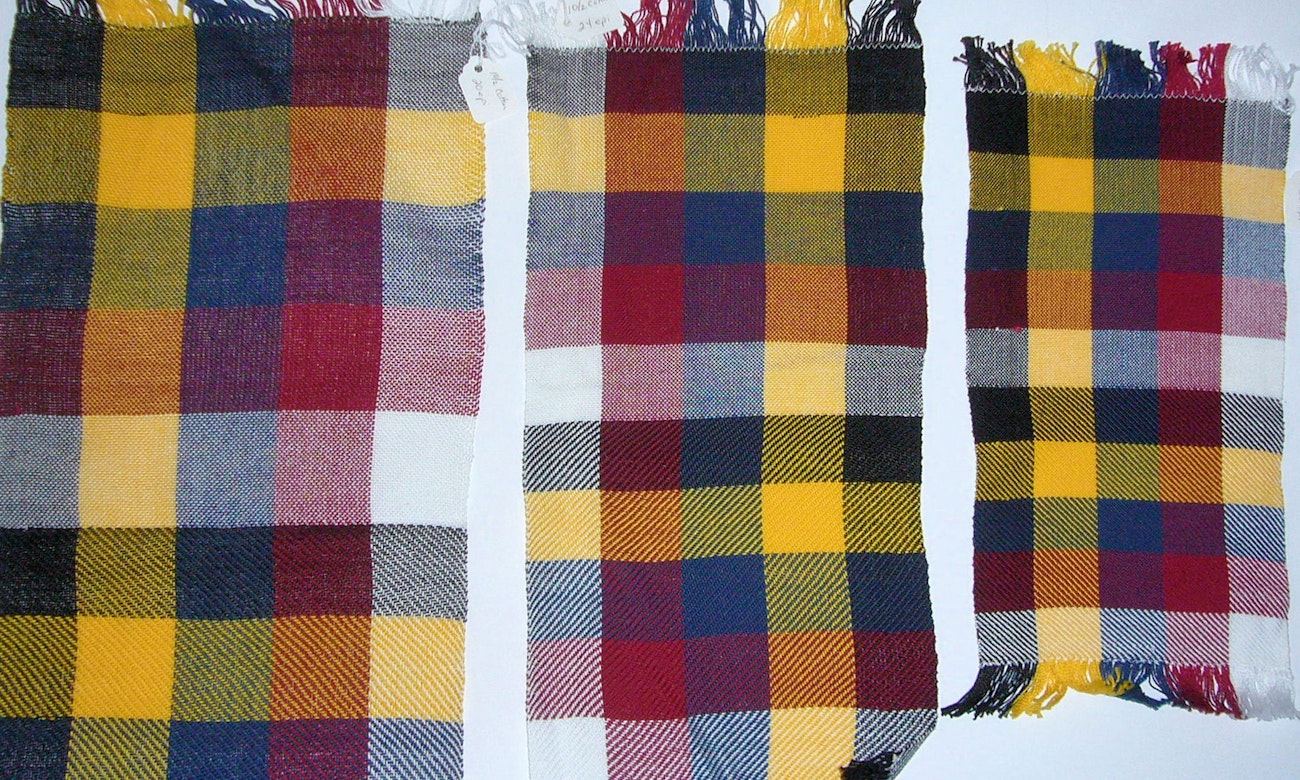
These samples were woven on the same warp at different setts. Left to right: 20 epi, 24 epi, 30 epi. The sample size changes dramatically, and the hand of the fabric also changes from a soft drape (nice for a scarf) for the 20 epi sample to the stiff, almost canvas-like hand (great for a bag) of the 30 epi sample.
Another aspect of finding the right sett concerns how specific fibers and structures interact.
Consider overshot, which has a plain-weave base cloth through which a supplemental weft moves, with those weft floats creating the overshot pattern. The sett of the plain-weave base must have enough space between intersections of warp and weft to accommodate the pattern weft, without distorting the fabric.
Enter what I call the “squish-ability” factor. A soft wool knitting yarn used as the supplemental weft in overshot has air space between the fibers, giving the yarn squish-ability. It compresses nicely between warp and weft intersections in the base cloth. A firmly spun pearl cotton has very little internal air space and won’t squish as readily, so a pearl cotton pattern weft might shove base fabric warp or weft threads out of the way.
In this case, sampling would include trying different fibers for the pattern weft and adjusting the sett of the base cloth until the pattern weft moves smoothly through it.
Take-up, Draw-in, and Shrinkage
Take-up, draw-in, and shrinkage all work together to make the final finished length of your weaving shorter and narrower than you might otherwise expect.
There are two types of warp take-up—one is due to the interlacement of warp and weft, and the other happens when you remove tension from fabric.
While you are weaving, warp ends must travel over and under the weft picks again and again. All those tiny moves—or interlacements—use up warp length and result in a shorter-than-expected fabric. And when you take your finished fabric off the loom, the warp yarns that were under tension as you wove shrink back to their natural length, again resulting in a shorter woven length.
Draw-in is the effect of interlacement on the width of a warp as you weave—it pulls the sides inward, narrowing the fabric. While weaving, you can reduce draw-in by angling or bubbling additional warp in the shed to accommodate those interlacements, and by using a temple to keep the fabric at its intended width as you weave.
Shrinkage happens during wet-finishing. Fiber content, yarn structure, and weave structure all affect how much a given project will shrink.
How should a weaver account for take-up, draw-in, and shrinkage when planning a warp? A common rule of thumb is to add 10 percent to a warp’s length for take-up and 10 percent to its width for draw-in. However, the only way to ensure that your project ends up the width and length you want is to weave a sample and measure the sample’s length and width on the loom, measure again off the loom before wet-finishing, and measure once again after wet-finishing. Divide the measurements taken on the loom by the wet-finished measurements. This will tell you the shrinkage ratio. If you multiply that ratio by your desired final measurements, you will find the length and width of the warp you need to start with (see Resources).
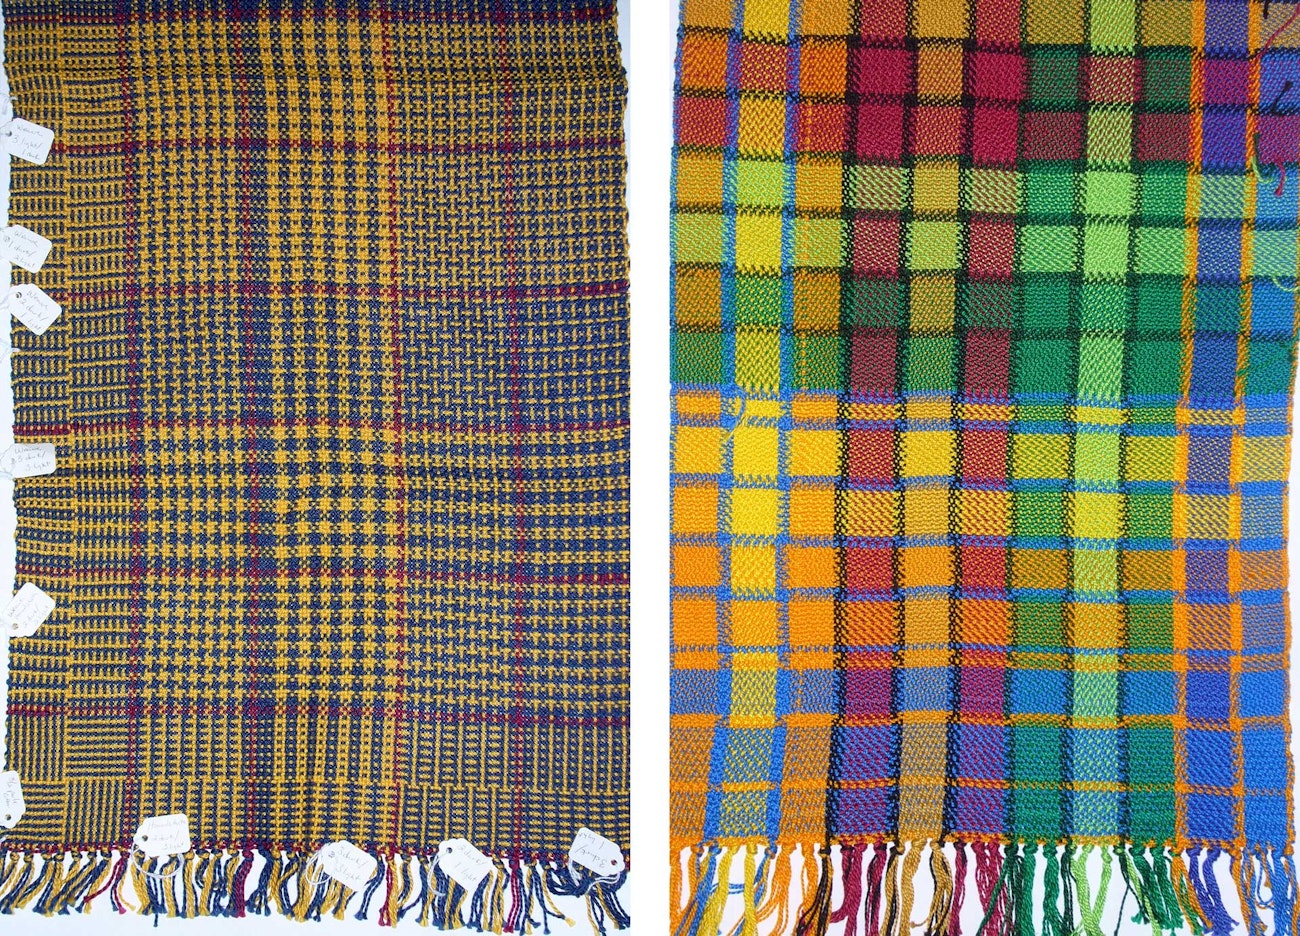
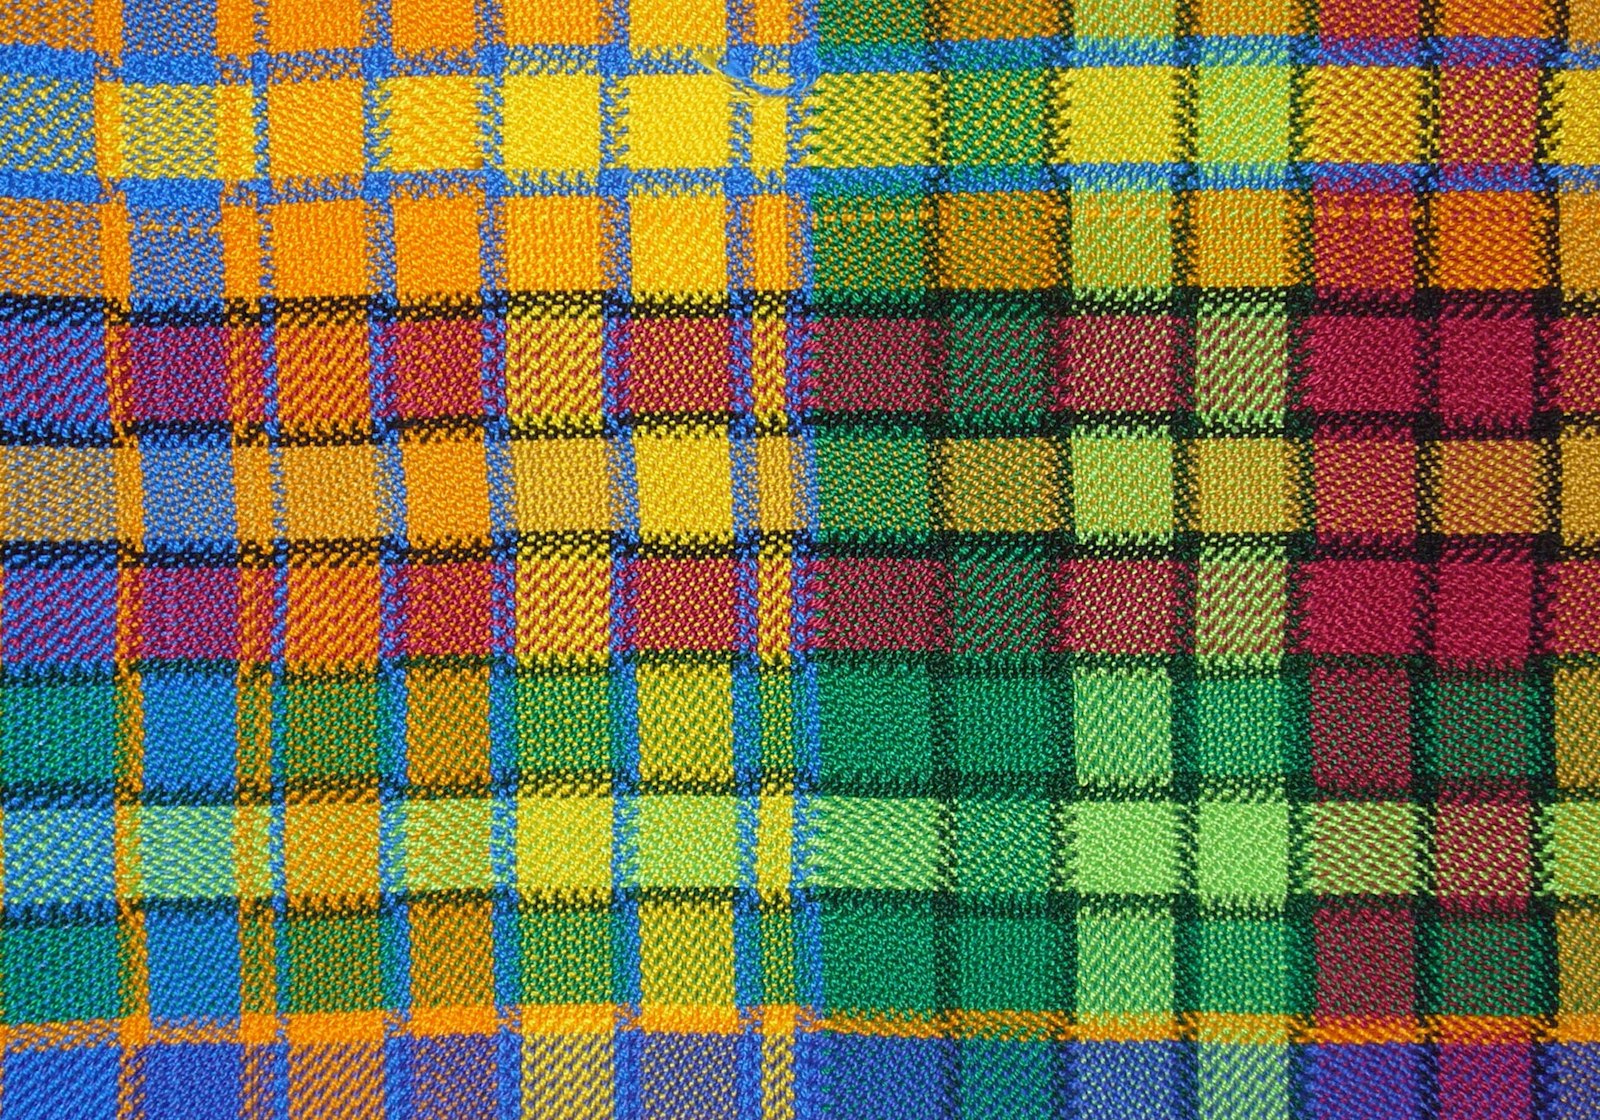
Left: This color-and-weave sample was an experiment to see what patterns develop in different threadings across the warp with different color and treadling combinations in the weft. The tags on the selvedges and warp ends note the warp and weft combinations for each section. Right: Half of the warp for a false damask sample was threaded with warm colors and the other half with cool colors.
Color
Colors work together in surprising ways when woven, and that means color interaction should be part of your sampling.
Weaving with two colors that look fabulous together on cones can result in:
- A totally new color—which can be good;
- A weave-structure design that disappears—not so good; or
- A muddy-looking cloth—bad.
Depending on the number of grouped ends of each color and on the weave structure, colors in the same value family may appear to blend as they interlace, making a muddy mess (see Resources).
When sampling for color, I wind a sample warp with one color combination of warp ends on one half and a different combination on the other half. Then, I play with weft colors to see how the colors interact. Having two combinations on one warp gives me a two-for-one sample. Playing with weave structure at the same time means a three-for-one sample. Add sett adjustments and it’s a four-for-one. Now that’s efficient!
After wet-finishing a sample warp, I make structure, sett, and color notes on tags and attach those at the selvedges and across one end. Then, I add the sample to my library and use it as a reference as I design other projects.
The best part of sampling is that there are no wrong answers, just discoveries to be made—and those discoveries can yield treasures while preventing disasters.
Resources
- Essen, Deb. “A Tale of Two Yarns.” Handwoven, March/April 2018, 18–19.
- Jackson, Sarah. “String Theory: Sampling for Success.” Easy Weaving with Little Looms, Summer 2022, 18–21.
Adapted from the original article "The Whys and Hows of Sampling" by Deb Essen, from Handwoven January/February 2023.
Deb Essen weaves, teaches, and creates kits for handweavers for her business, dje handwovens, in the beautiful Rocky Mountains of Montana.