Add a new tool to your weaving tool box by learning how to tie a new warp onto an existing warp. There is debate as to whether it is faster or not but there is no debate that you will preserve a perfect threading and sleying by doing so. Read about Tom's experience with the method. (If you are going to try it, make sure you secure your cloth beam so it doesn't roll backwards before you cut your fabric off the existing warp. Ask me how I know that can be an important step!) - Susan
Even though it was years ago, I remember it like yesterday. Two guild members were discussing the work of another member. “You know,” said one, “she’s been called the Honey Suckler. The only pattern she weaves is honeysuckle twill from Davison.” I was shocked, but I still laughed at these two grown adults as they spoke like middle school mean girls. I thought, So what if she loves honeysuckle twill; then she should weave it. And honeysuckle does offer a lot of treadling possibilities. Look it up. It’s on page 132 of A Handweaver’s Pattern Book by Marguerite Porter Davison, also known as “The Green Book.”
I later found out that the Honey Suckler sold her work at a yearly craft fair. Honeysuckle twill had become her trademark and a really good seller for her. She wove towels and table runners in different colors but all on the same warp. When she came to the end of the warp, she cut off the towels and removed them from the loom, but as she did so, she left about 8 inches of warp in front of the reed, tying the ends in bouts to prevent them from slipping back through the reed. Then she attached a new warp of the same number of ends to the breast beam, securing the cross with lease sticks and leaving about 8 inches of warp extending from the cross. She sat in front of her loom and tied the new warp to the old, and, when she had finished, she eased the knots through the reed and heddles and beamed the new warp as usual. Our friend disliked warping, and she thought this was faster than threading heddles and sleying the reed. I was skeptical and had my doubts that this technique was faster and more efficient. I knew that I could sley and thread a warp faster using conventional methods. Besides, I never do the same project in succession. I like doing different things. Then one day . . .
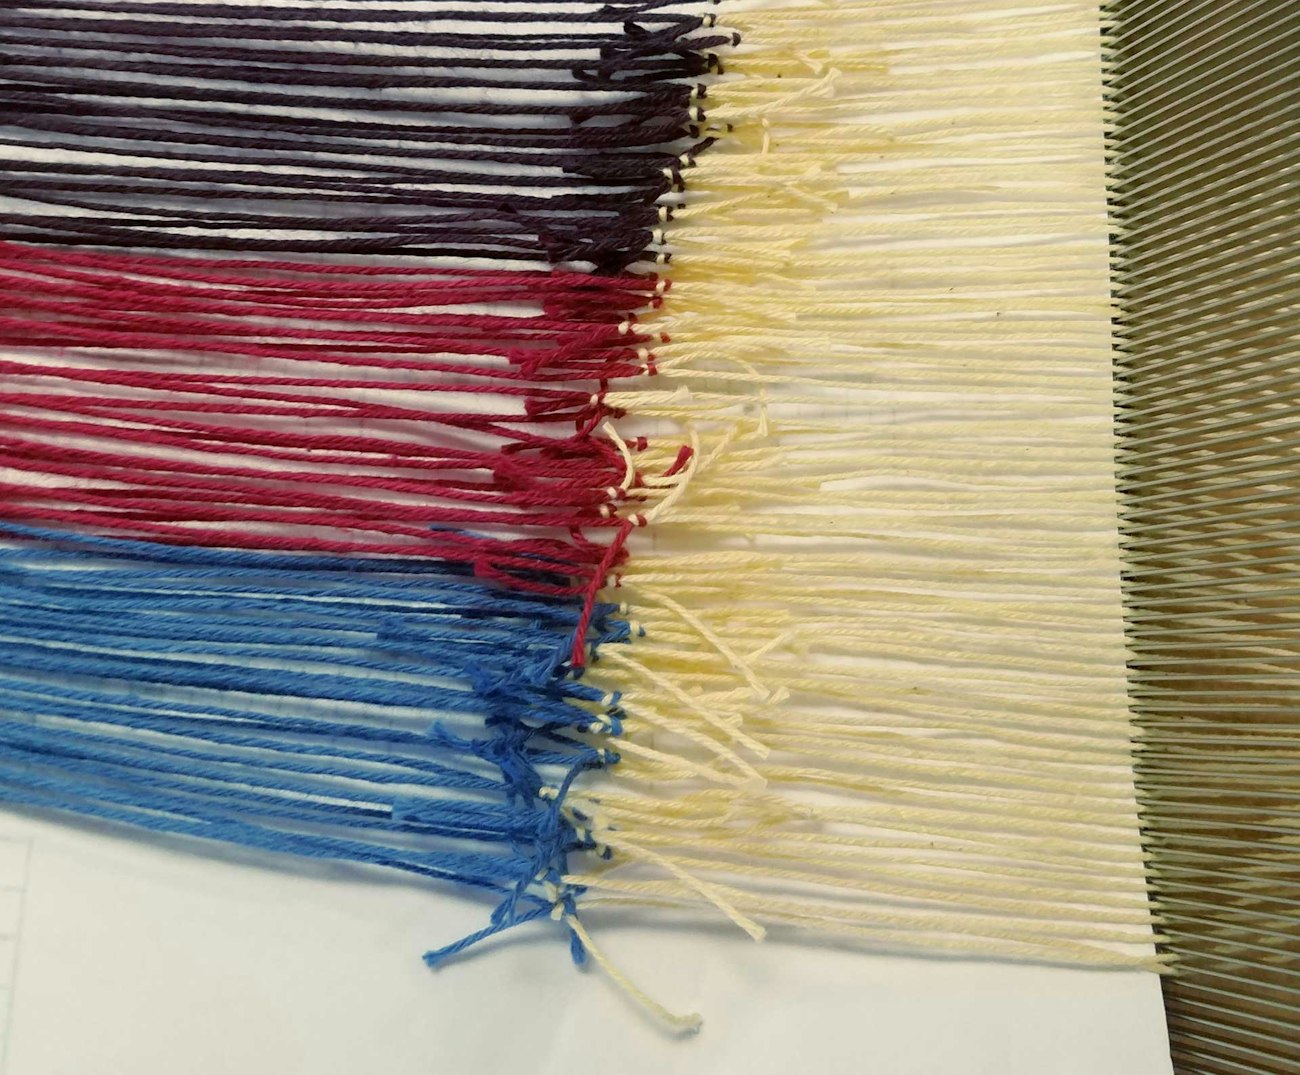
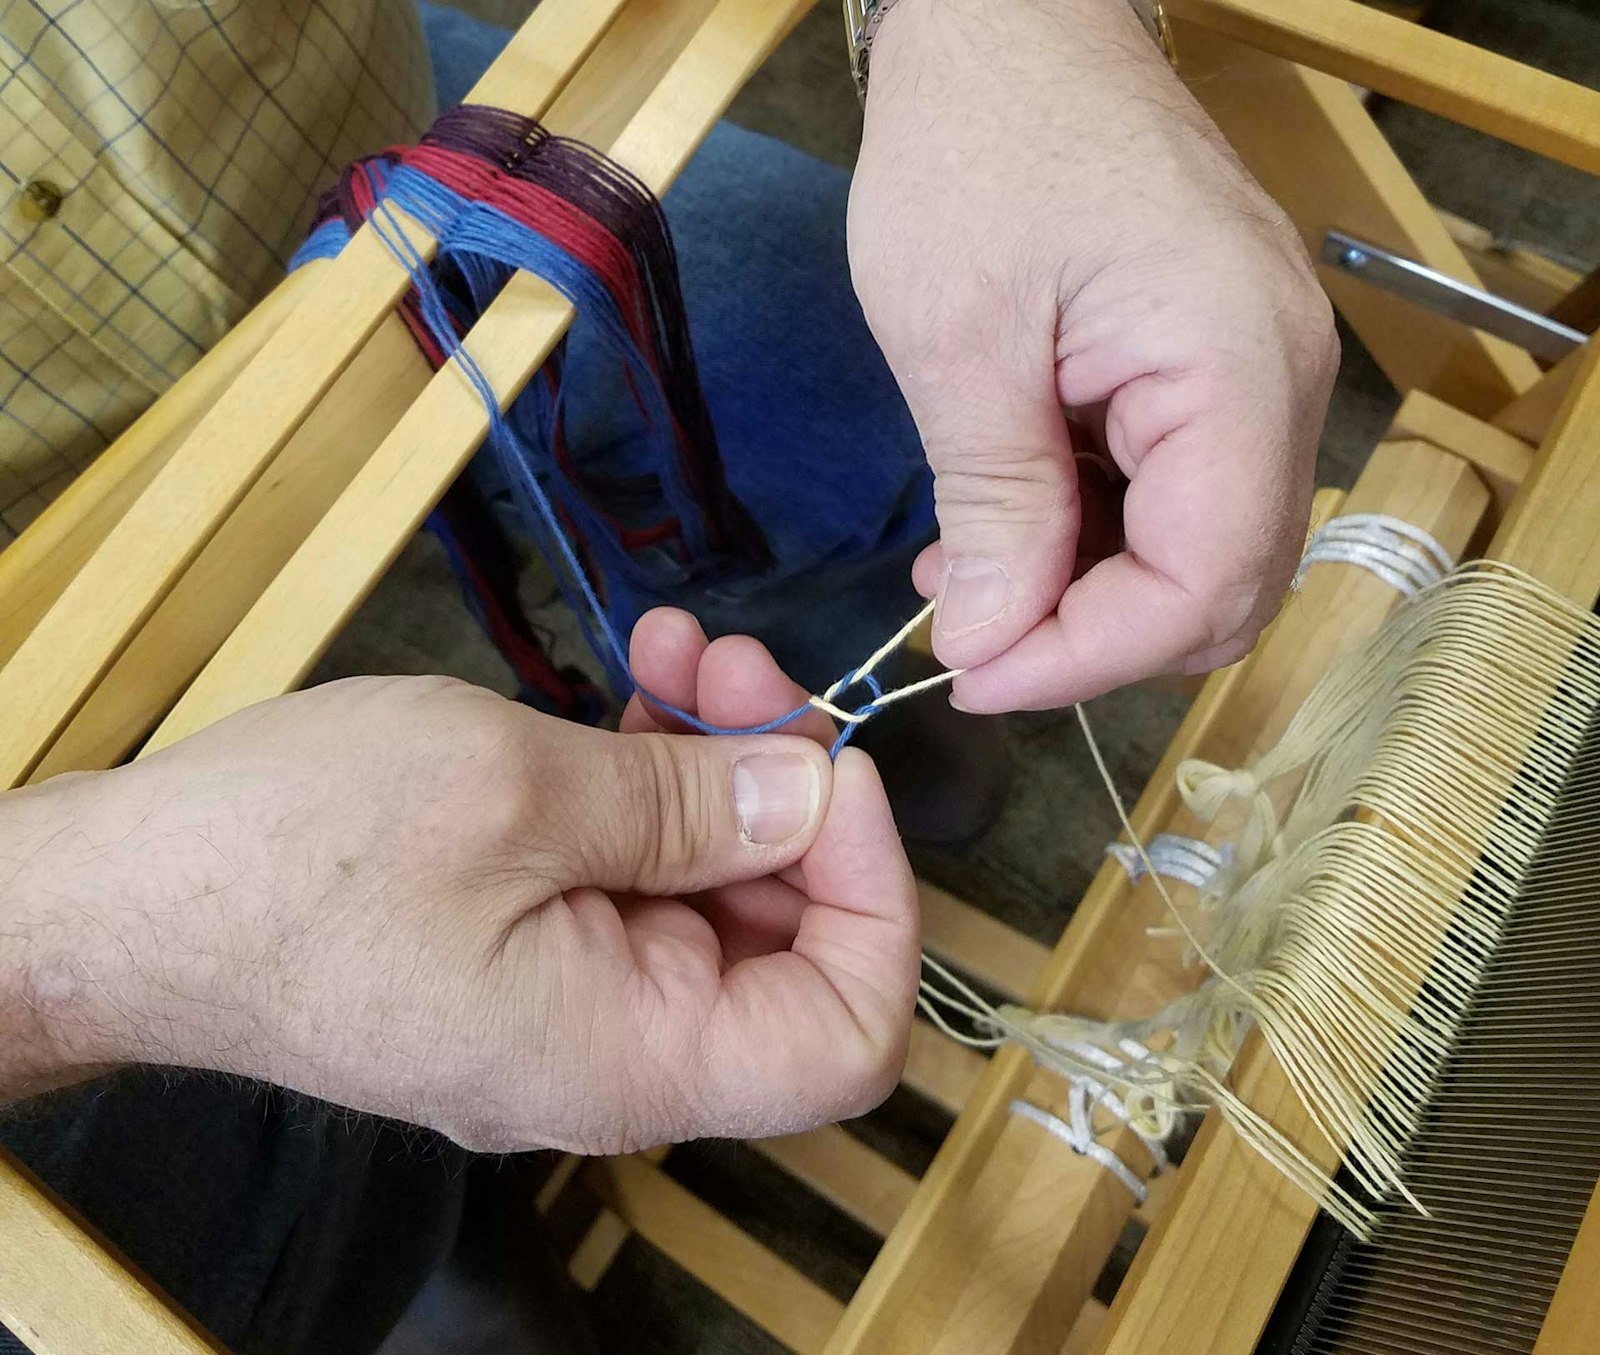
Tom’s second warp tied to his original.
I had just finished weaving some table runners on my new countermarch loom. The pattern was a 14-shaft star-and-diamond tied-overshot structure. The warp was 20/3 cotton, and I had sett it at 30 ends per inch—it also had 504 ends, and all of those 504 natural-colored cotton threads were threaded through new, bright Texsolv heddles. I have to say, threading that warp was a bit of a challenge since I sometimes have problems with depth perception. It was like looking at a sea of shifting white threads.
I wanted to weave some more identical runners, but the idea of rewarping right away for this same project with all those fine threads seemed overwhelming. Then I remembered the Honey Suckler. All of a sudden, tying all those little warp ends seemed like a practice of some merit. If it works, I thought, I won’t have to second-guess if my eyes are seeing shaft 10 or shaft 11. All I will have to do is carefully pass all those little tied ends through the reed and heddles. Once through, it’s clear beaming!
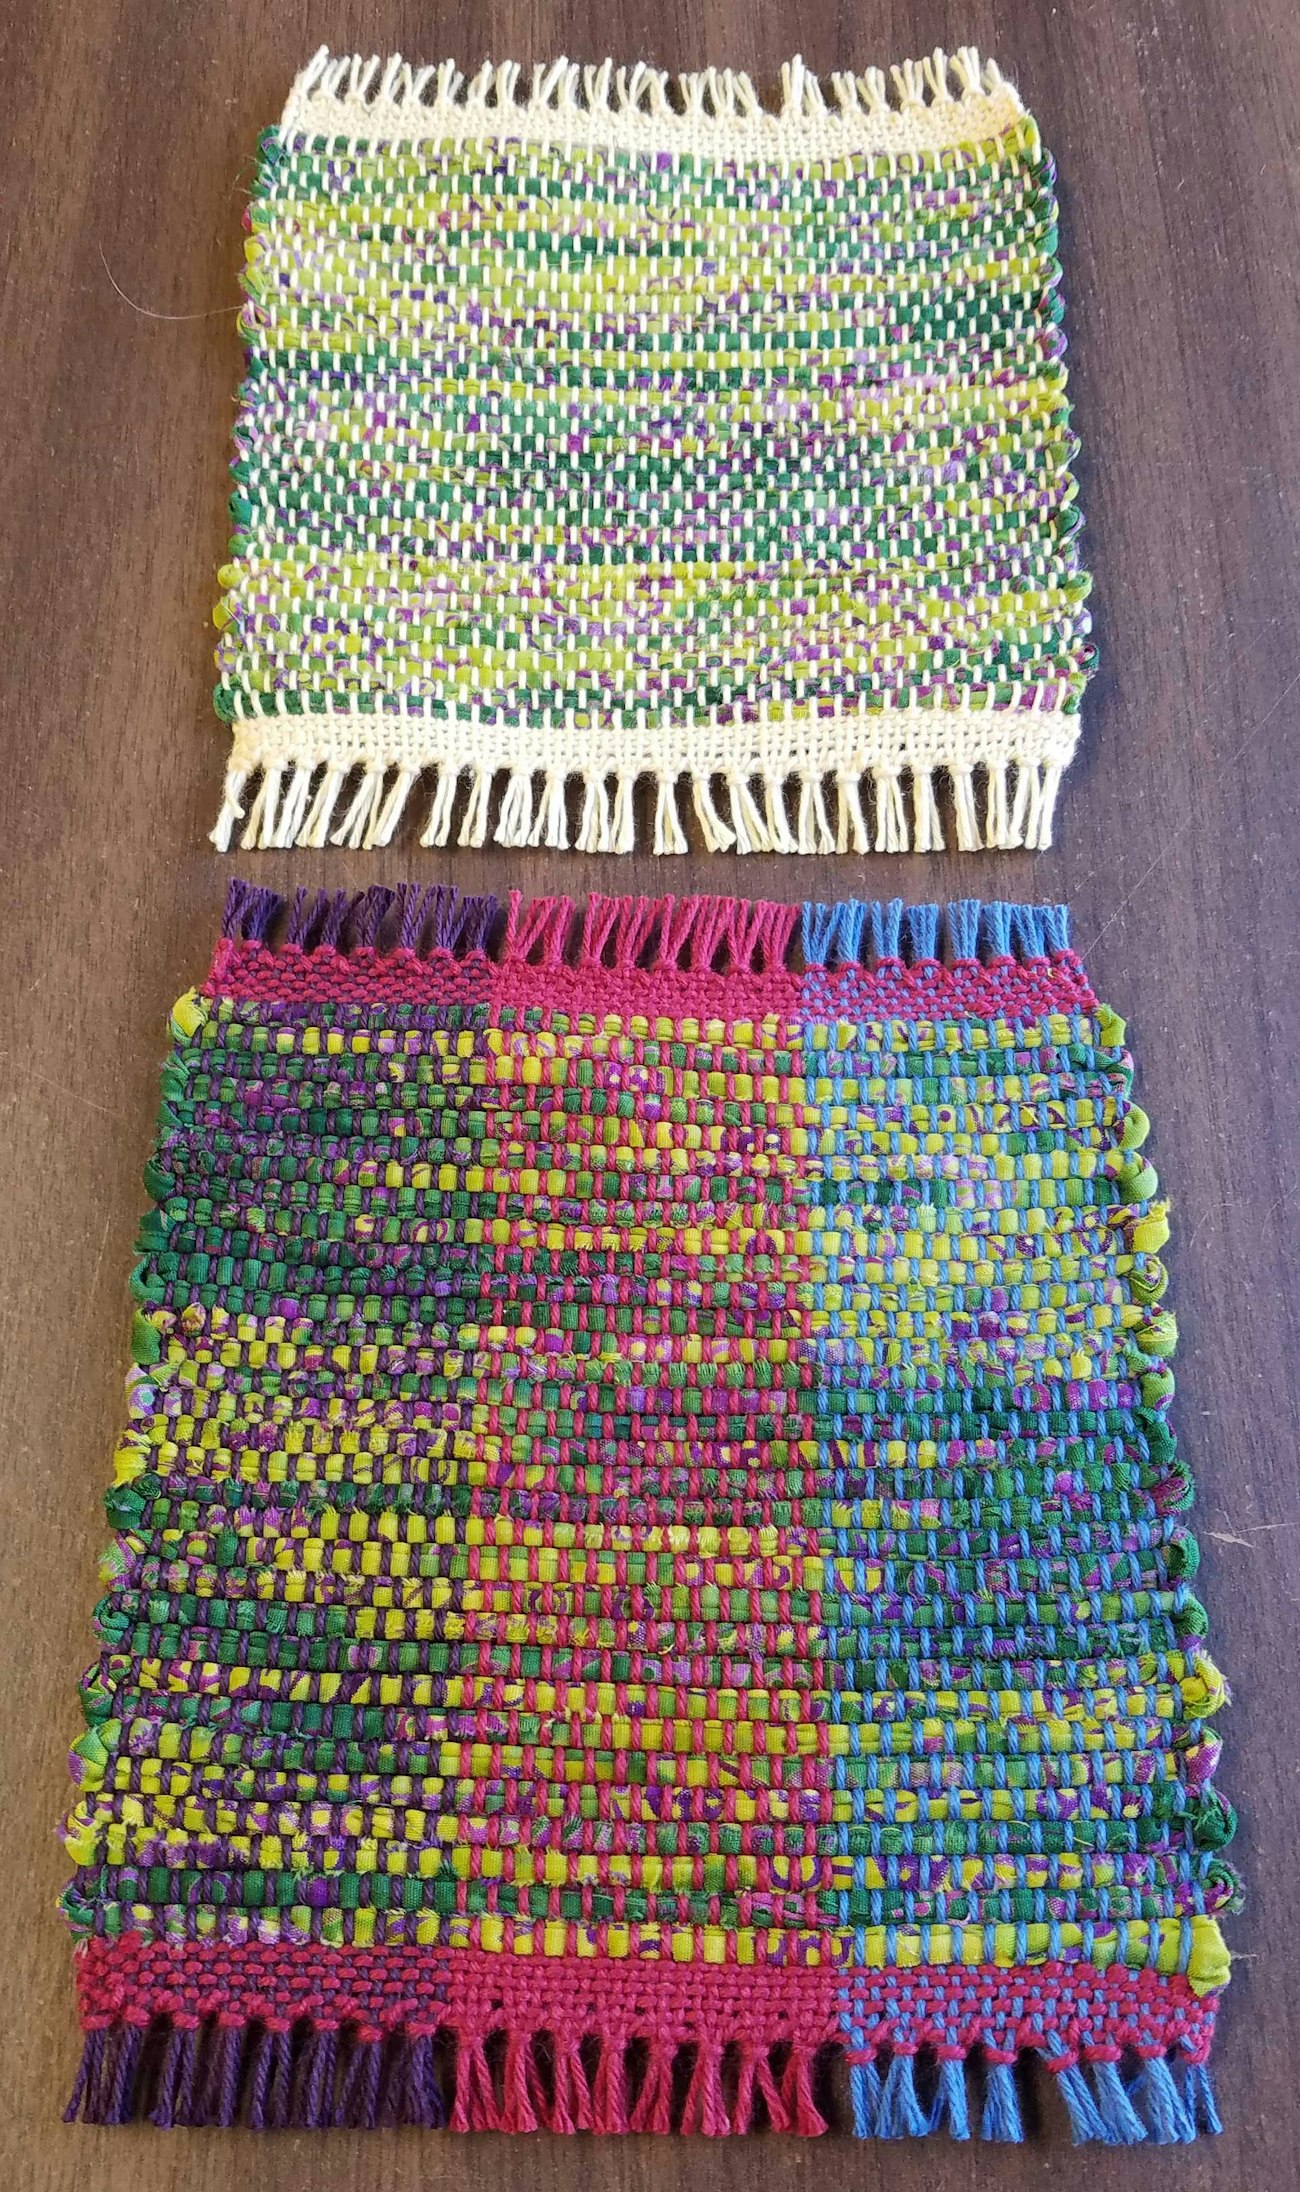
Tom’s runner from the original warp (top) and one from his second warp (bottom).
I wound a new 12-yard warp of 504 ends with 20/3 cotton for several more runners. I put lease sticks through the cross and secured the lease sticks to the front breast beam. Then I cut through the end of the warp exposing 504 individual ends. Taking a deep breath, I started tying the new warp to the old warp, one end at a time. I found an illustration for a surgeon’s knot and decided to try it. When tying knots, I usually fall back on overhand or square knots, but the surgeon’s knot seemed to be a better choice. It looked smoother and stronger, and if I was going to be pulling these knots through both the reed and heddles, I wanted a knot that wasn’t going to come apart during the process. As I saw it, if my surgeon uses this knot to hold my gizzard in place so it doesn’t drop out with the first cough, it’s good enough for me to tie warps together.
Tying 504 warp ends together took some time, but, when I was done, I felt a sense of accomplishment. I also looked at all those knots and for a moment doubted that tying on was going to work. There were a lot of knots. Then I thought, Come on, if the Honey Suckler has been doing this for years, well, so can I. I put a little tension on the warp and started to wind. When the knots reached the reed, the warp came to an abrupt stop. It looked like I needed to work, maybe by hand, all those tiny knots through the reed. I could see I had a problem, but just like a scene from a movie, the heavens opened up, the angels sang, and I thought, Why not open a tabby shed and let those knots pass through the reed on two different planes? That was it! The knots slipped through with a little help and then passed right through the heddle eyes without any problem. I didn’t have a single break or knot come undone. It was a eureka moment.
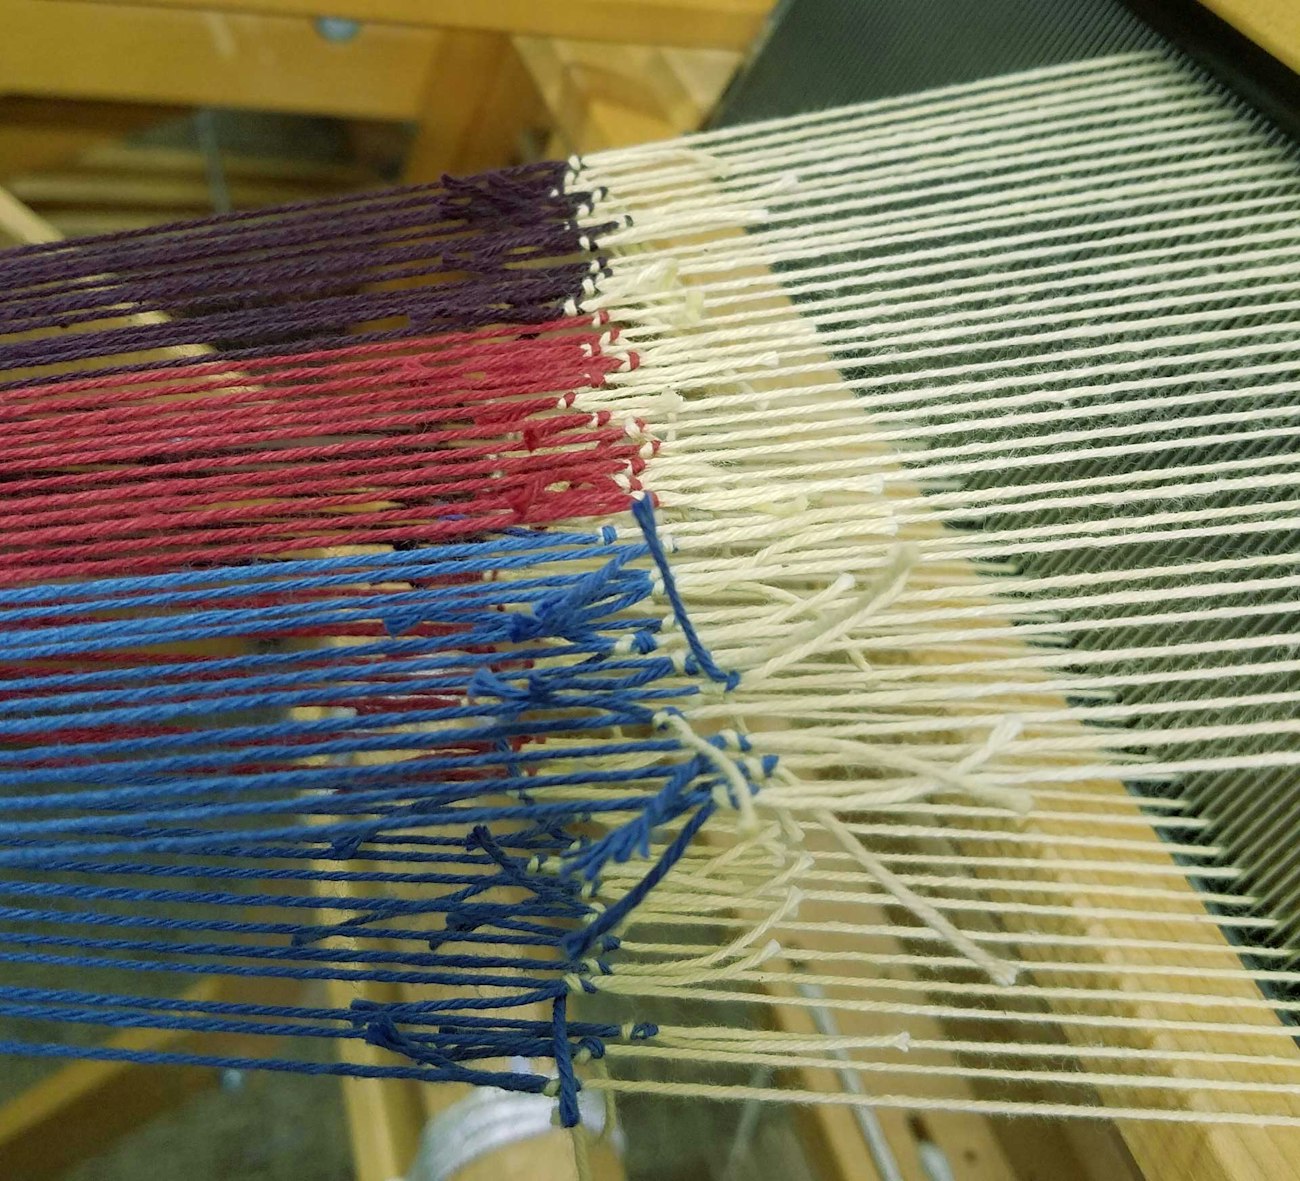
To help the knots make it through the reed without getting caught, Tom opened a tabby shed as he wound that part of the warp.
I have to tell you that I warped my loom this same way several more times until I was finished weaving star-and-diamond table runners. As much as I loved the pattern, I was ready to move on to another project. I was not going to be a production weaver like the Honey Suckler. I needed to change things up. I have from time to time used this method of tying one warp to another, but I find I can warp my loom more efficiently—and faster—working on one warp at a time. I have shared my experience of tying on with other weavers, and they, too, have had little or no problems. Try it, and, when you do, remember to open the shed when the knots are passing through the reed. Many thanks to the Honey Suckler.
I wish you all tight warps, clear sheds, and, as always, happy weaving.
Tom