Your loom’s reeds play an important part in your weaving. They keep the warp aligned and evenly spaced before it‘s woven, and after you throw each pick and bring the beater forward, they beat the weft evenly against the fell.
Because they‘ve been made in different materials over the years, and because they‘re available in a variety of weaving widths and dents, you may be wondering whether you’ve got the right reeds in your studio. And are you storing them properly to avoid damage?
I hope these tips help answer some of your questions.
Incidentally, I always wondered about the word “dent.” Then one day it became as clear as the nose on my face. The word “dent“ comes from dental—as in teeth. The spaces in reeds with 12 dents per inch are separated by 12 teeth per inch. Now that makes perfect sense!
What Width and Size Reeds Should You Have?
For the projects that I weave, I generally use 8-, 10-, or 12-dent reeds. On the rare occasion when I have a bulky-weight yarn in the warp, I use a 6-dent reed to avoid abrasion. I rarely use a 15-dent reed with a single end per dent; I’d rather use an 8-dent reed and sett my warp at 16 ends per inch, with 2 ends in each dent. For warps sett at 30 or 45 ends per inch, I do turn to a 15-dent reed, but I usually stick with my three favorite sizes.
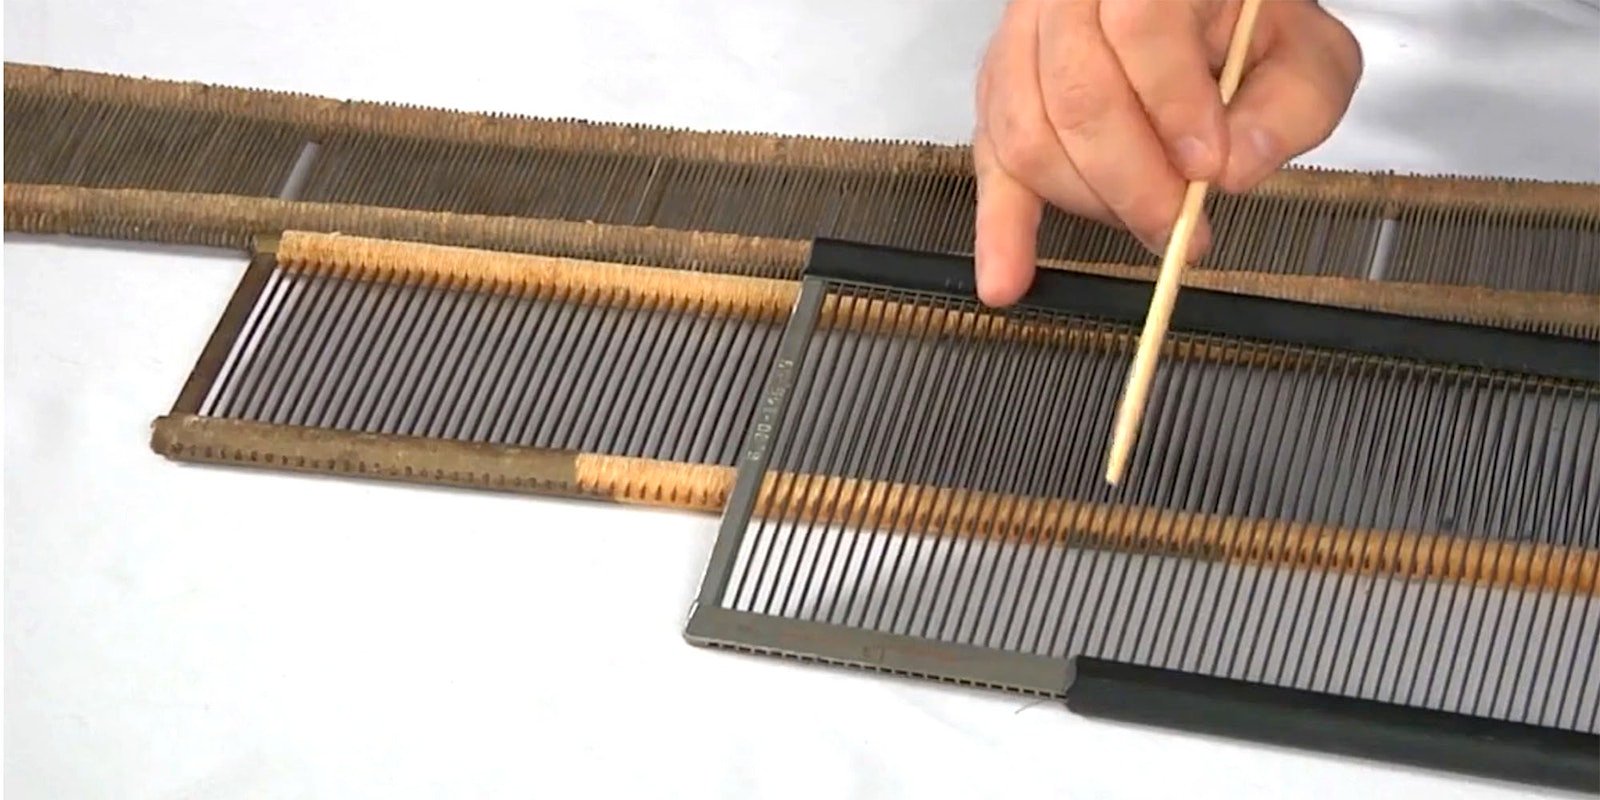
While I‘d love to have a set of these three sizes for each of my looms, instead I share reeds between looms and often use a narrow reed in a wider beater if the project allows it. I have even put a wider reed in a loom with a narrower weaving width. For instance, if the beater’s ends are open (as the picture below shows), I might use a 45-inch-wide reed in a 36-inch loom. It looks funny, but it works just fine.
 Tom has found that he can use reeds made for wider looms on looms that are narrower. They work the same as reeds made for the width of the loom—the only difference is the overhang off the sides. Photo by Tom Knisely
If you‘re buying a new loom, the manufacturer usually includes your choice of a 10- or 12-dent reed, but you can often request a different size. How do you choose a size? I suggest that students make a list of a dozen or so projects they‘d like to weave along with the dent size they‘ll need for each project. That should make your decision easier. But do try to have 8-, 10-, and 12-dent reeds in your collection, which should do you well for most projects.
There are rare exceptions, though. A weaver once told me that she‘d purchased a large amount of fine silk thread and planned on using it to weave many scarves. She figured that the sett should be around 90 ends per inch, so she planned on sleying three ends per dent in a 30-dent reed. She was ready to purchase a 45-inch reed to fit her loom. But because reeds are sold by linear inch rather than by number of dents, the cost of that reed was expensive—prohibitively so. And if she only wove scarves, the unused end sections of the reed would be a waste of money. So I suggested she purchase a shorter reed!
How Should You Care for Reeds?
Because reeds are pricey, you want to take good care of them. Here are some tips that I have found valuable.
Storage: Try to store long reeds horizontally, which will help to keep them straight. If you lean them up against a wall, they risk developing a slight bend, although you can carefully straighten them by gently pushing against the bowed area.
Shorter reeds are fine stored vertically. A reed holder (see below) is a great addition to your studio. It has compartments to separate different sizes, with ample space to hold several reeds.

Stands like the one here provide a safe place to store reeds and other tools. Photo courtesy of Glimåkra
Shelves: If you store reeds stacked on a shelf, be careful when pulling one out to use. Don’t slide your selected reed over top of others, because doing that can cause bent teeth and make a section of the damaged reed useless.
Flaking paper: Sometimes the paper covering the edges of a reed becomes brittle and falls off. This doesn’t affect the utility of the reed, but it does expose the ends of the metal teeth. You can replace this covering with heavy-duty tape, such as duct tape. Cut the tape to the length needed and fold it over the reed’s edge. If it‘s too wide and extends over the reed‘s teeth, use a utility knife to cut off the excess. Having a friend hold the reed on its edge while you trim the tape is a great help.
Discoloration and rust: When you purchase a new reed these days, you‘ll notice “SS” (for stainless steel) stamped on the side bar. Years ago, weavers could buy reeds made of either carbon steel (at significantly lower prices) or stainless steel (at higher prices). Weavers who lived in humid areas found that carbon steel reeds discolored and rusted over time, while those expensive stainless steel reeds didn’t. In the past, many people took the risk, though, and bought the less-expensive option.
If your collection includes older reeds that are discolored, that is a cosmetic issue and is not a problem because it doesn’t interfere with their function.
Rust is different matter, though. If you have a reed with a little coating of rust on its surface, that can usually be removed. Spray the reed with WD-40 and then, using a nylon scratch pad like the one you may have at your kitchen sink, wipe along the teeth (don‘t wipe across them). Spray a little more WD-40 on the area, and wipe with a soft cloth. Then slip a length of yarn or a pipe cleaner between each pair of teeth to remove excess rusty lubricant. If a little of the lubricant remains and gets onto your weaving, it will often wash out with the first wet-finish. You might also wind an extra yard of warp for the first post-cleaning project, and discard the initial section of the fabric if rust or lubricant transfer to it. Cleaning a slightly rusty reed this way is a slow process, but perhaps worth it to you.

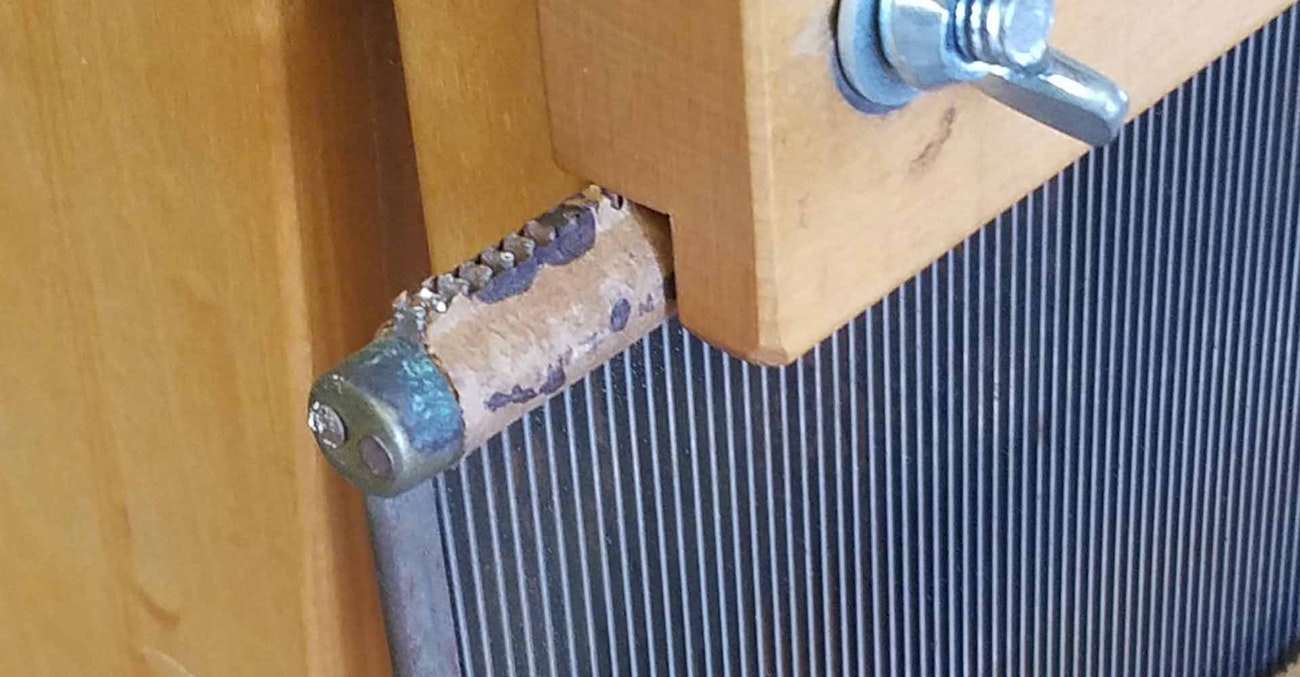
The edges of Tom’s antique bamboo reed, left, are wrapped in hemp or linen twine to separate the dents. Some reeds aren’t worth saving—like the rusty version with bowed teeth on the right.
If your reed is badly rusted and you notice rust between the teeth, as in the photo at right above, you should probably discard it. Rust creates pitting which will abrade the surface of your warp ends as they pass through the reed, making that area of your cloth feel rough. Pitting may even cause warp ends to break. This problem will never get better.
I personally never try to rehabilitate a rusty reed. For me, it’s just not worth the time spent. Neglected reeds usually come to me when I purchase a used loom. I figure that what I save by buying an older loom allows me to reward myself with brand-new stainless steel reeds.
Best wishes to you and, as always, happy weaving.
Tom
Published Oct. 6, 2021; updated Oct. 17, 2024