Fear of warping is one of the main things that holds new weavers back—but don't let it scare you! You can take joy in the methodical process, and the more you do it, the easier it gets. Having detailed step-by-step instructions at hand is a must the first few times you warp your loom! That's why we're here to help with these three downloadable PDFs detailing the three most used methods.
Each type has its own set of advantages and disadvantages, and the truth is, there's no one right way of warping a loom. It's all about what's easiest for you as a weaver, what works best with your particular loom, and what method makes the most sense for the project you're working on. By reading below, determine which method is the best for you. Download one or all three of the PDFs below that contain warping instructions for multi-shaft looms. Learn the method that seems to fit you best, but don't stop there. Keep going and learn all three methods. That knowledge will come in handy in the future! Trust us on that!
Front to Back Warping

Warping front to back means you start on the weaving side of your loom, sleying the reed and threading the heddles before winding the warp onto the back-beam. You might prefer this style of warping if your loom has a removable back beam that allows you to get in close to the heddles from the back while you're threading. As far as equipment goes, you won't need to own a raddle, or worry about placing lease sticks.
Front-to-back warping also allows you to wind different parts of the warp separately (such as all of one color or weight of yarn at a time) in their own chains. This is because you can sley each chain separately it its respective dents across the reed. With back-to-front warping, you have to wind the warp threads in the exact order they will go on the back beam.
Back to Front Warping
Back to front warping means that you start by beaming the warp. The warp passes through a cross held in place by lease sticks that keep the order of the individual threads and through a raddle that maintains warp width. Then you thread the heddles and sley the reed, sitting at the front of your loom.
Warping a loom back to front can be a good choice if you're sleying multiple ends per dent. The ends pass through the cross and are beamed in their correct order before they are threaded. With front-to-back warping, the ends in one dent can become twisted around each other between the reed and the heddles, making beaming more difficult.
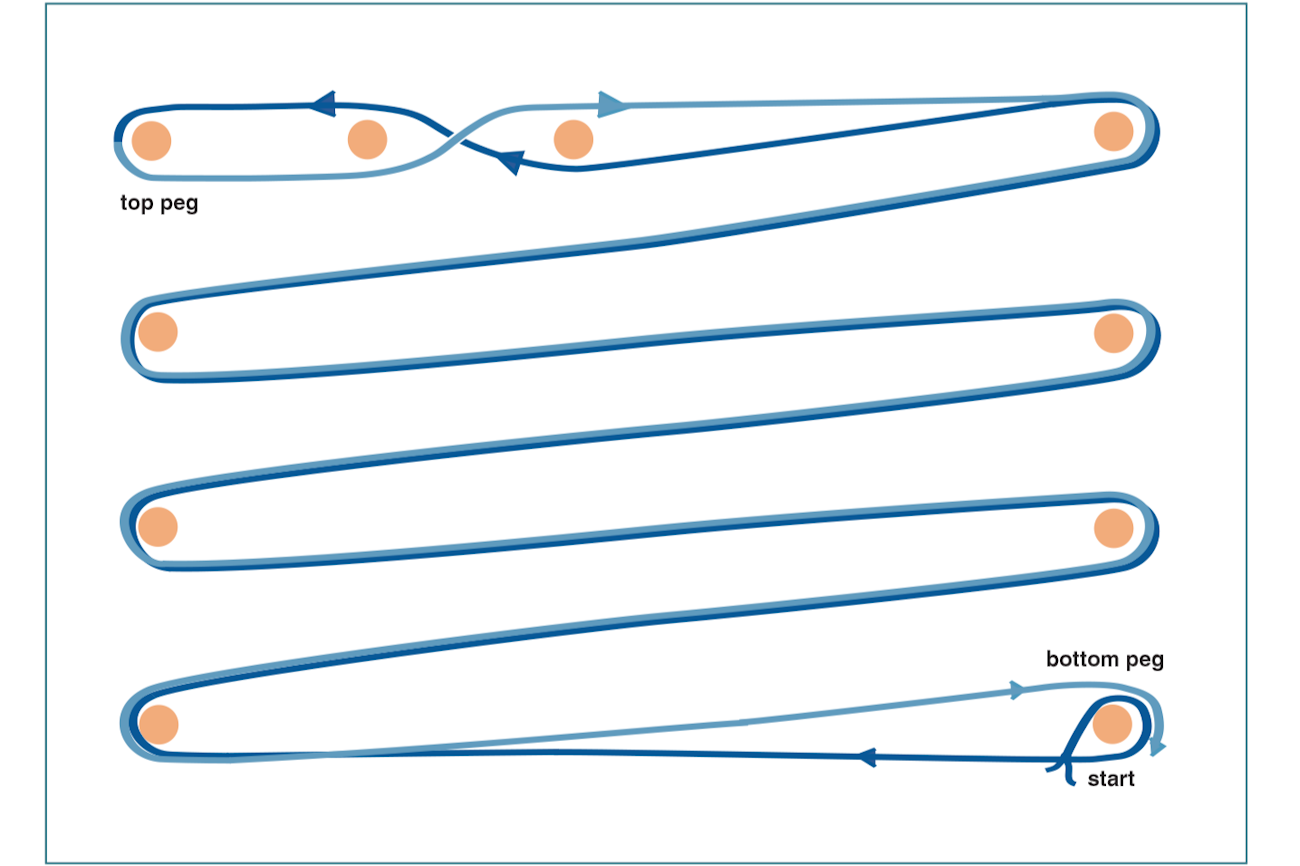
Warping Back to Front with Two Crosses
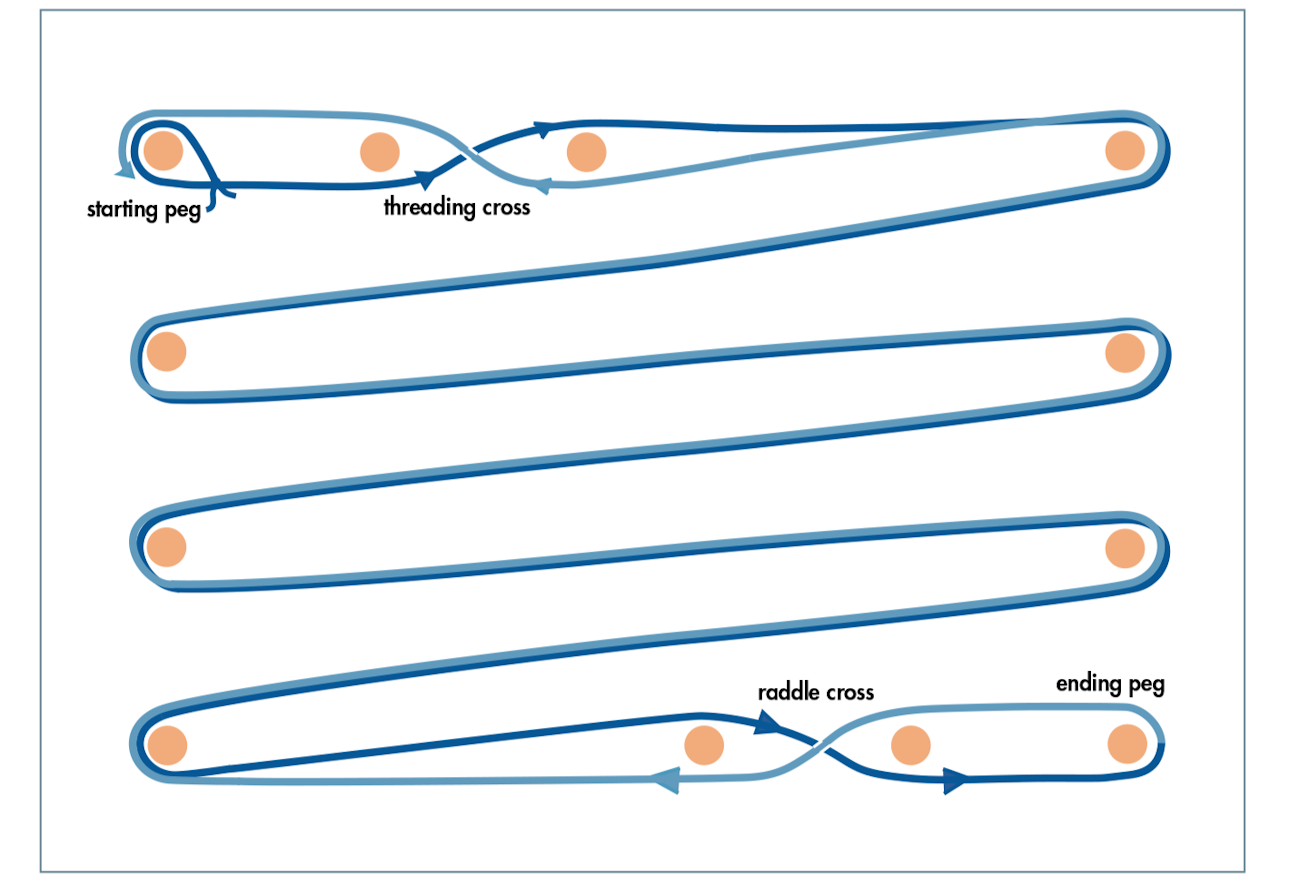
Warping back to front with two crosses is useful for warps with threads that are extremely fine, very sticky, or overly-twisted. The warp is beamed through a raddle cross only so that the threads do not have to separate individually as they are beamed. A threading cross at the opposite end of the warp is then used for threading the heddles.