Weaving with a wavy shuttle is fun, and it’s a simple and effective way to break out of the grid and create attractive undulating patterns, which can sometimes even look three-dimensional. Although just about any weaving can be done using a wavy shuttle, as with any tool, there are certain guidelines to follow. If you do, you will be able to create beautiful, wavy fabrics that hold their patterns.
First, you need to consider and adjust for the distance each weft pick needs to travel. When weaving with a wavy shuttle, not only does the yarn have to go over and under the warp ends but it also has to go over the hills and down the valleys of the wavy fell line. This means you will need to use a greater weft angle than usual.
You can use a wavy shuttle as both shuttle and beater or as a beater only. If you are weaving with one color at a time, it can serve both functions. Wind your weft onto the wavy shuttle as for a regular stick shuttle. To weave, open the shed, pass the wavy shuttle through, change the shed, insert the shuttle into the new shed, beat with the shuttle, and then continue sending the wavy shuttle through the shed. Change the shed and continue weaving.
Diagonal pattern on the loom, using the wavy shuttle as the beater. Photo credit: Liz Evans unless otherwise mentioned.
If you are weaving with two or more colors, it’s easiest to wind the weft on regular stick shuttles and use the wavy shuttle as a beater. To weave, open the shed, pass your regular shuttle through, change the shed, insert the wavy shuttle, beat with the wavy shuttle, and then remove the shuttle. You are now ready for your next weft pick.
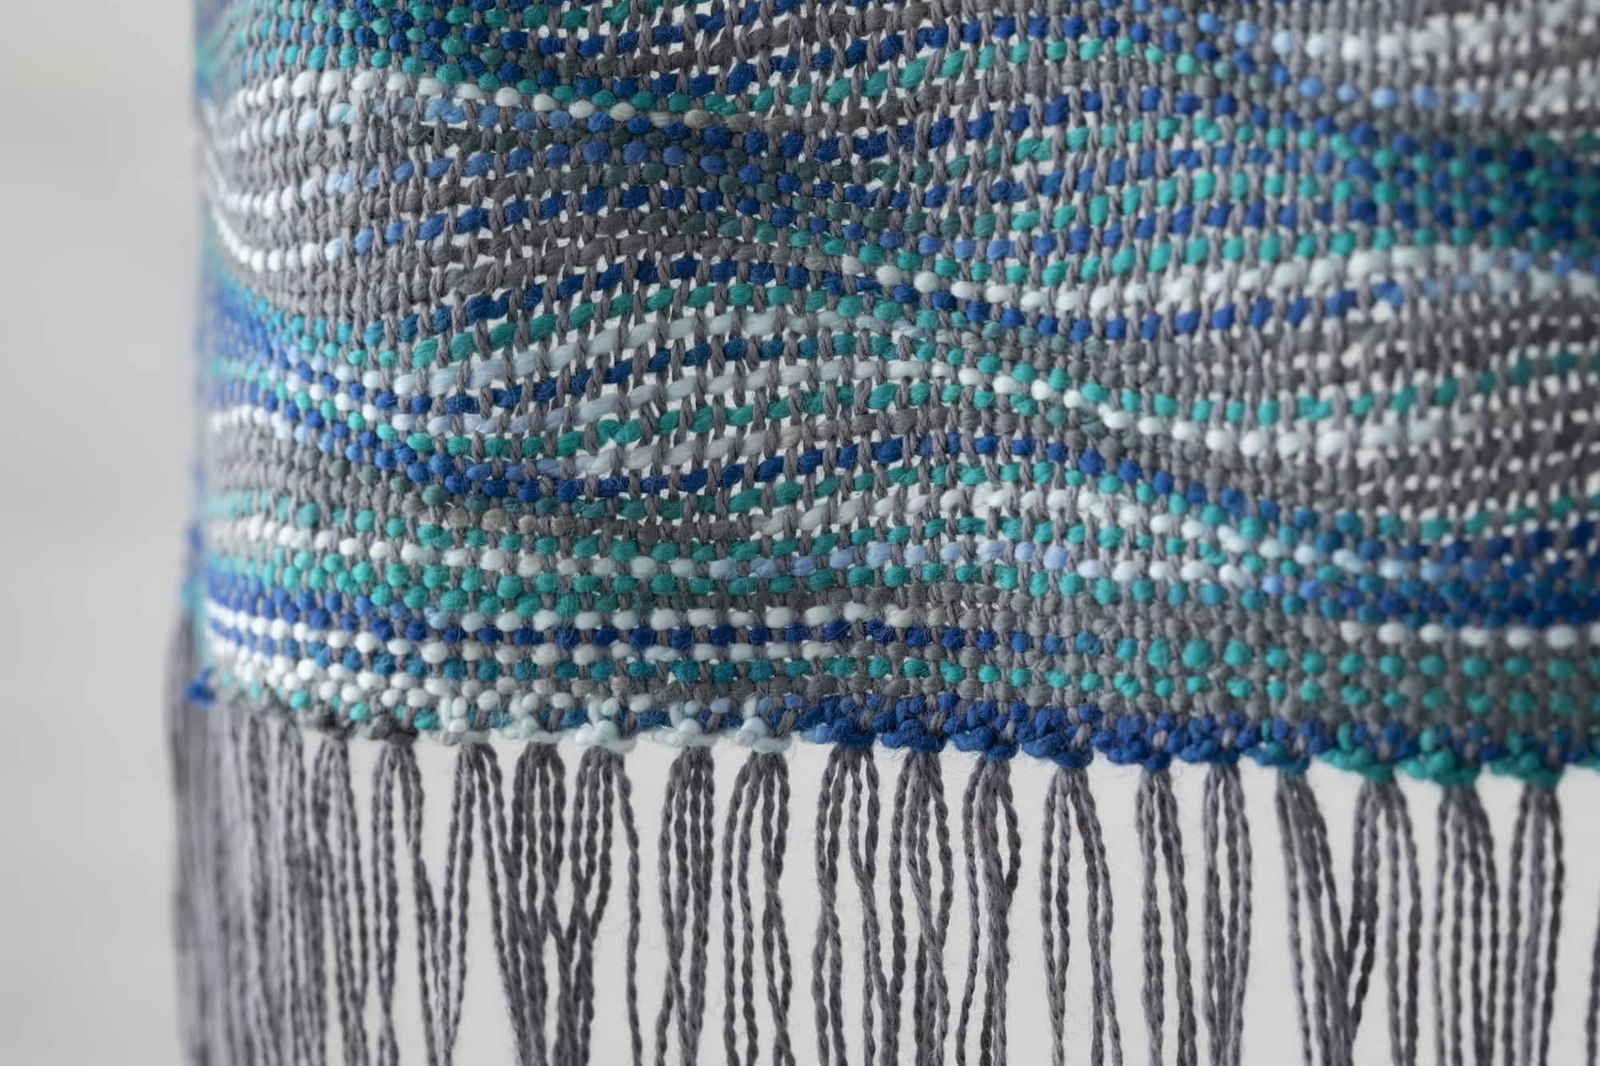
Losing the beautiful waves after weaving and finishing can be a problem with wavy weaving. Often, when cloth is no longer under tension on the loom, the yarn relaxes, and waves suddenly turn into ripples. Another culprit can be vigorous handling during wet-finishing, causing the weft to settle into previously empty spaces. Stacked waves can be prone to both of these problems, but fortunately there are at least three other patterns that are more reliable at holding their waves.
Picking the right yarns for a wavy project is also important. Avoid slippery yarns such as shiny synthetics and silks that will move about easily. Instead, choose yarns such as wool and mohair that are inclined to be “sticky” and less likely to shift out of position with fulling and handling. Using different warp and weft colors also helps the waves stand out. Most importantly, always weave and wet-finish a sample to test your yarns before beginning a project.
Stacked waves after wet-finishing a piece woven in light worsted-weight yarn in both warp and weft.
Wet-Finishing
To prevent too much movement of the yarns during wet-finishing, put your wavy weaving into a bowl of warm water with your preferred detergent and leave it to soak for half an hour or so. If you feel the need, you can gently press and squeeze the cloth, but don’t swirl or wring. Rinse in warm water. Carefully remove the cloth and squeeze, don’t wring, to remove the water. Finish by rolling it in a towel and then spreading the cloth out flat to dry.
Another option for wet-finishing with more control is to roll the cloth in a sheet of bubble wrap. Put an old towel down to catch any stray drips and then lay a sheet of bubble wrap on top of it. Smooth side up works well, but it doesn’t really matter. Lay your cloth on top of the bubble wrap. Fill a plastic bottle with holes punched in the lid with warm water and a few drops of detergent. Gently squirt the water onto the cloth and, if necessary, press the water in with your hands or a scrunched-up plastic bag to make sure the cloth is well saturated. Roll the bubble wrap and cloth into a cylinder, and then gently roll it back and forth about 50 times. Unroll, check the cloth, and if necessary, use your fingers or a smooth tool such as a knitting needle to push any stray yarns back into place. Roll it up again from the opposite end and repeat two or three more times or until the cloth is fulled to your satisfaction. Rinse and lay the fabric flat to dry.
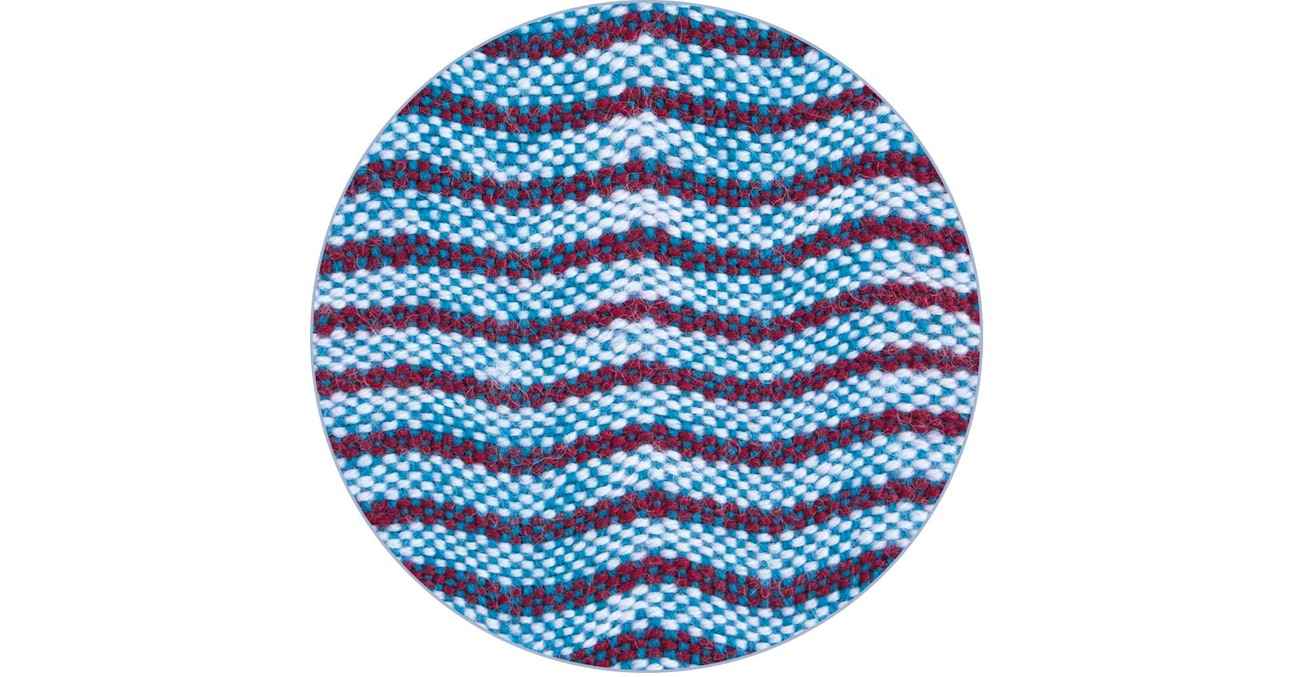
Zigzag pattern after wet-finishing. This piece is a combination of light worsted-weight wool in the warp and fingering-weight wool in the weft.
Patterns
While there are almost limitless possibilities for patterning with wavy shuttles, I tend to use one of four types of patterns.
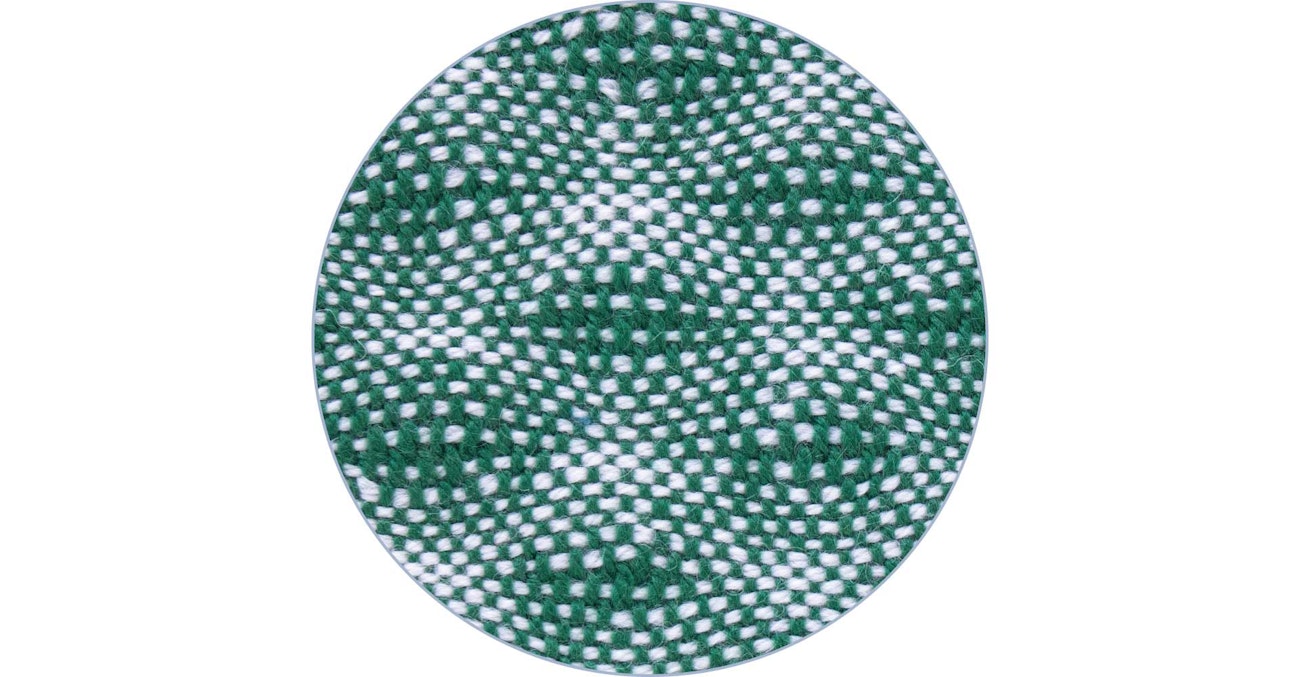
Offset stacks in light worsted-weight wool after wet-finishing.
Stacked Waves
Beat with the wavy shuttle in the same place for every pick, and the waves will stack directly on top of each other. Try using a space-dyed or self-striping yarn so the color changes accentuate the waves. Wavy stacks make fabulous stripes with a difference, although they’re more prone to losing their waviness than the other patterns are.
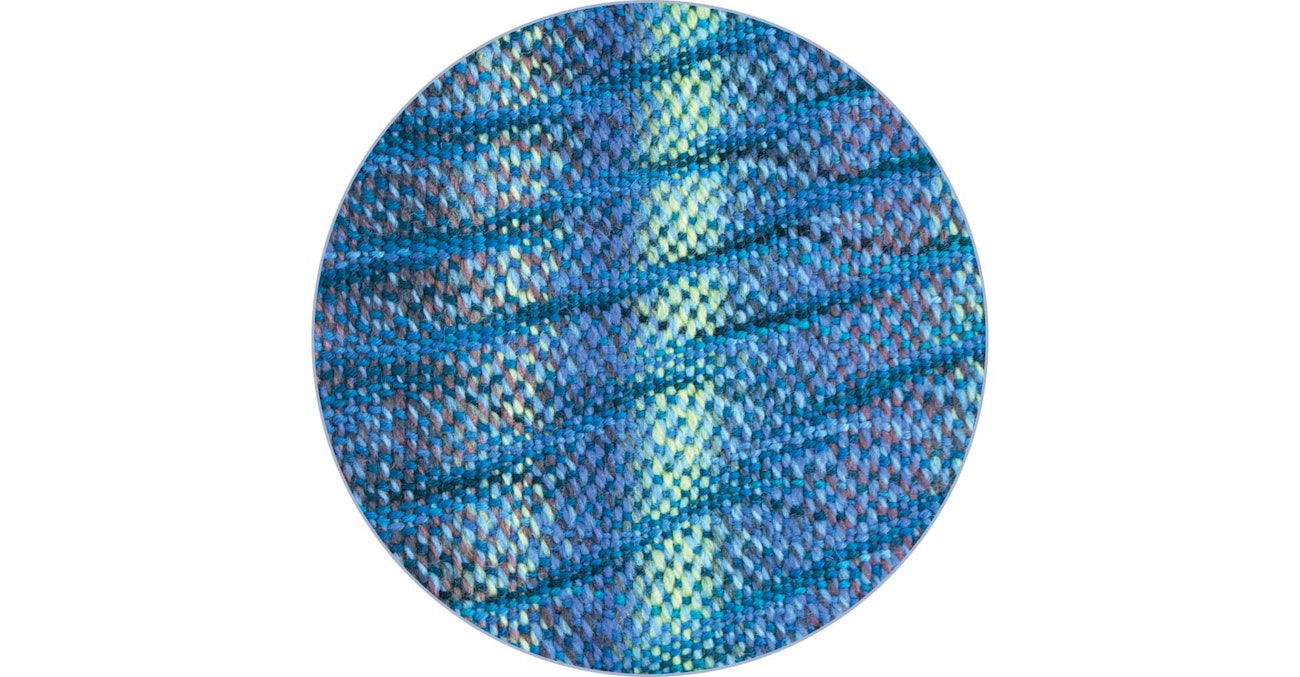
Detail of diagonal-patterned scarf using self-striping light worsted-weight wool in the warp and a more subtle, although still variegated, fingering-weight wool in the weft.
Offset Stacks
Weave a section of stacks as described above, then move the shuttle to beat the next section so that where you previously had a hill, you now have a valley, and where you had a valley, there is now a hill. For a symmetrical pattern, weave with one color and the same number of picks in each section, or play with different colors and/or textures and number of picks for a more random pattern.
Detail of diagonal-patterned scarf using self-striping light worsted-weight wool.
Diagonal Patterns
Make diagonal patterns by shifting the wavy shuttle a little to one side each time you beat. Moving a short distance, ½ to 1 inch, will give you a steeper angle on your diagonal. Moving the shuttle a longer distance will create a shallower angle. The diagonal will travel in the direction you move the shuttle each time, so simply keep going in that direction; as the pattern line moves off one edge of your weaving, another one will be coming in from the other edge like magic.
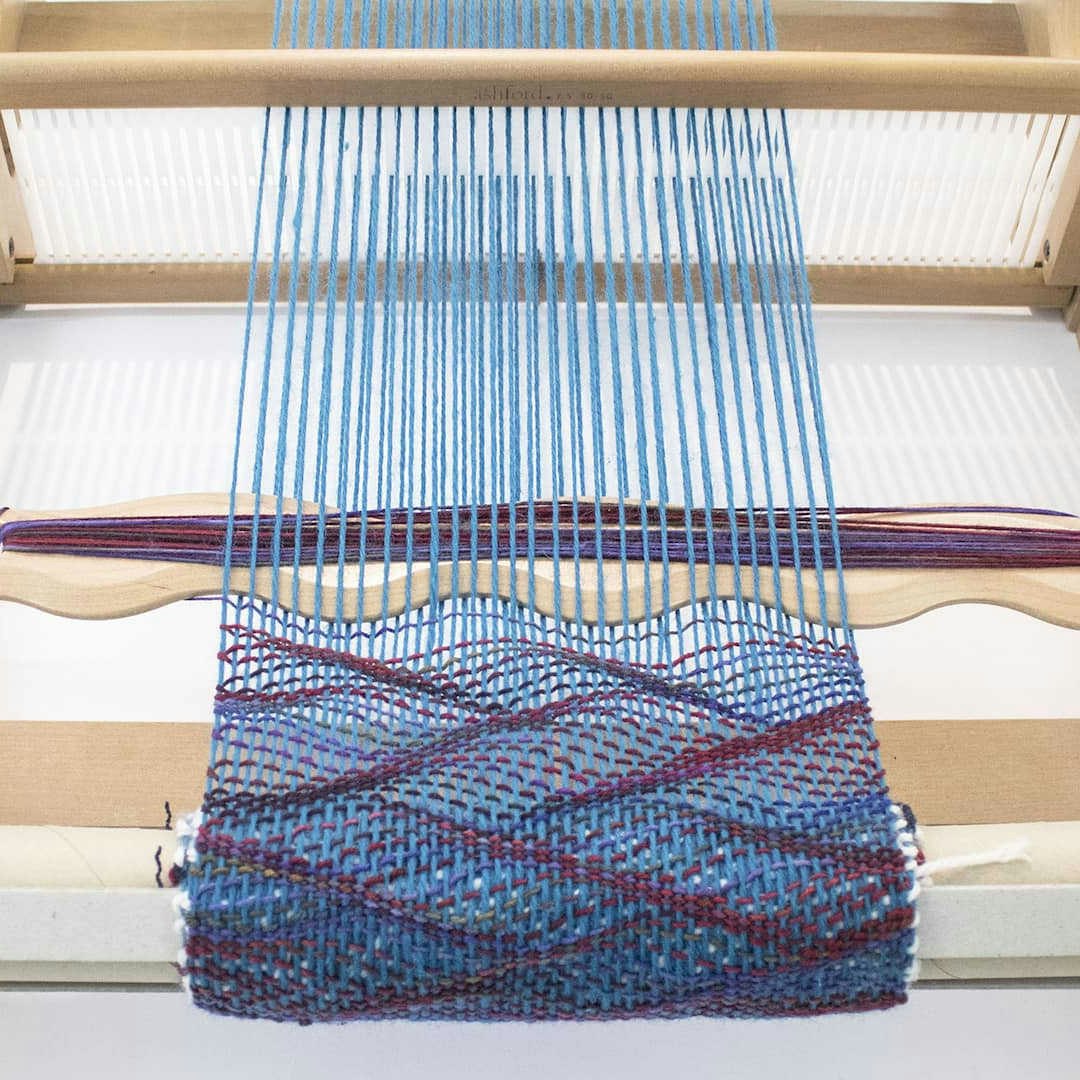
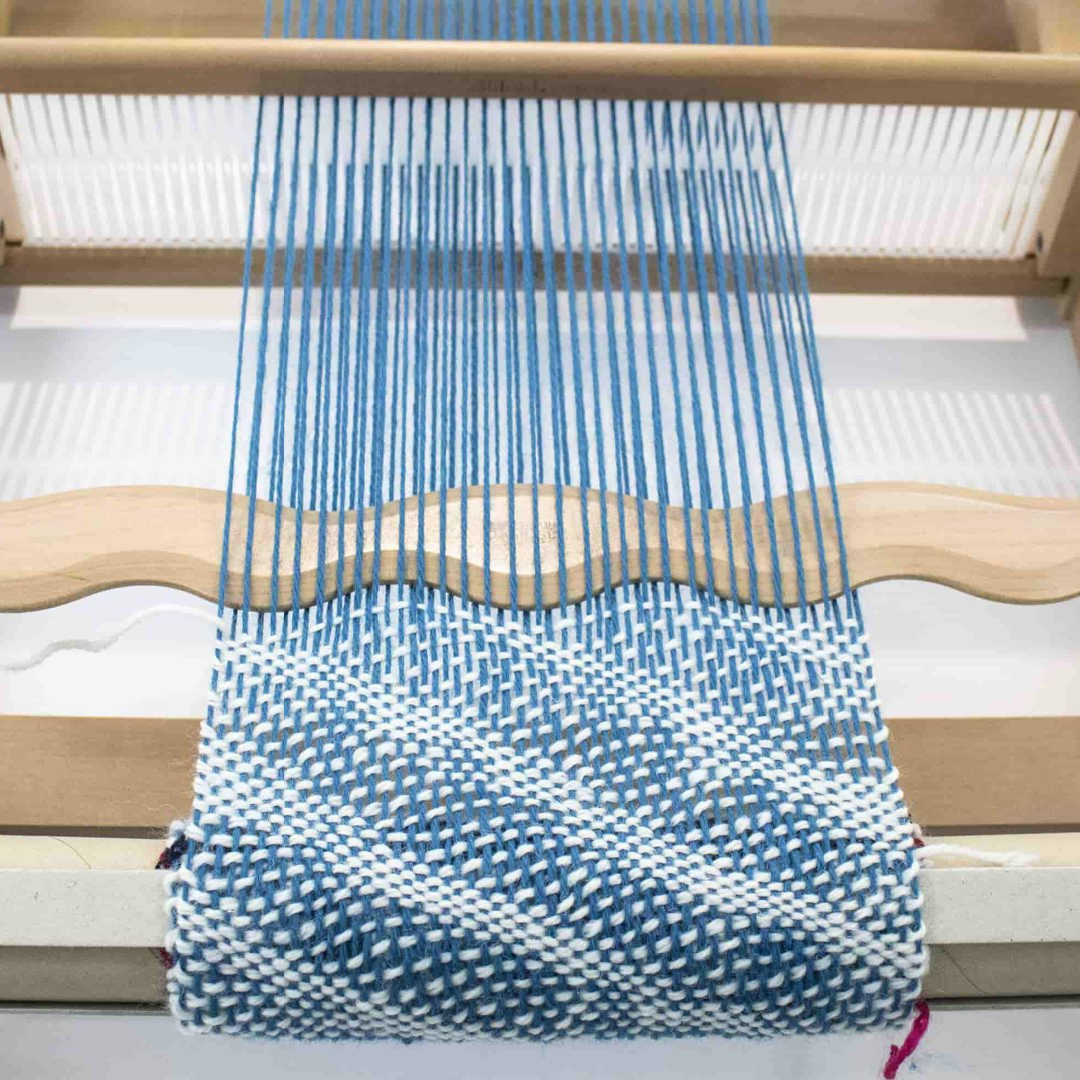
Zigzag pattern as it appears on the loom. For this piece the weft yarn is wound on the wavy shuttle.
Zigzag Patterns
To weave zigzag patterns, start with a diagonal, then change the direction you are shifting the shuttle. The diagonal will now travel in the opposite direction. Weave as many picks as you like and change direction again. Zigzags can be woven symmetrically by weaving the same number of picks between each change of direction, or you can change direction whenever you feel like it for a more casual result.
The possibilities are endless in the adventure of wavy weaving, so pick up a wavy shuttle and go exploring. Try different combinations of yarn type, size, color, and texture in the warp and weft. Can you make any other patterns? What would happen if you used your wavy shuttle with color-and-weave or with pick-up patterns? I don’t know either, but what fun finding out.