
Although the Team Colors Weave-Along is over, the free PDFs of patterns are still available and linked in the article below! We also think Elisabeth and Susan's tips for finishing scarves are evergreen. Happy Weaving!
I’m in favor of thoughtfully finished weaving, so two of the things I love about the Team Colors Scarves is that they each have a different finish, and each finish complements the scarf and the yarn it is woven with. In this post we offer finishing tips and techniques you’ll want to know.

Although Susan often fringes her scarves, she like how this hem looks on the Jagger Spun Away Scarf; so neat and tidy.
Photo by George Boe
Team Colors Scarves: Finishing
- The Jagger Spun Away Scarf is hemmed, giving it a clean, sophisticated look.
- The Halcyon Yarn Away Scarf has long, twisted fringe with 3 rows of twining that sets the fringe off.
- The Halcyon Yarn Home Scarf was hemstitched on the loom and the yarn was left “natural,” as in not twisted or braided. Halcyon Yarn’s 2-ply Victorian Wool fulls slightly in the wash, making it more durable for that type of finish.
- The Jagger Spun Home Scarf was hemstitched and has long, tightly twisted fringe that gives it a festive air and protects the superwash wool from fraying.

The Victorian 2-ply is the perfect candidate for creating stable untwisted fringe. Photo by George Boe
Elisabeth Hill and I agree: Plan your finish before you start! When starting a project, you should always consider its finish before taking the first pick—and sometimes even before that.
Here are some finishing tips to think about when starting your scarf:
- Hems generally look a lot nicer when the underhem portion—the hem portion that isn’t visible—is woven in a much thinner yarn. That makes for a clean fold and a less bulky hem. In addition, if you are hemming a piece, lashing onto the front apron rod is a better choice than tying on, as it creates less loom waste.
- If you want long fringe, tying on is the better choice. If you are worried that you don’t have enough length in your tie on for fringe, tie on, spread your warp, and untie one of your bouts and measure it. Twisted fringe can have a lot of take-up, so add an extra 30% to the length of fringe you want. For example, for 6” fringe, allow 8” of unwoven warp. Give yourself some leeway in case not all of your ends are exactly the same length, but don’t be overly generous; you don’t want to run out of warp because of carelessly tying on.
- For hemstitched with natural yarn fringe, either lashing on or tying on will work, and your decision should be based on how long you want the fringe. If you want fringe that is less than 3” long, lashing on will probably work—but just check that you have enough length between the knots and the start of the scarf, plus an inch or so. If you want fringe that is longer than 3”, tying on is a better choice, although you will have to undo the knots when removing the scarf from the loom.
Once your planning is in place you can weave with confidence. If there is any chance you will forget what you did (Susan's personal specialty) write it down, you can even write it on the back of your twill tape for a permanent record.
That brings us to finishing techniques:
- Instructions for hemstitching and twisting fringe can be found in virtually every issue of Handwoven and in most beginning-weaving books. Those instructions can also be found here.
- Last year, we added a step-by-step tutorial for twisting fringe to our website. (I am using a fringe twister in the pictures, but twisting fringe can also be done by hand; it just takes longer.)
- Twining is a finishing technique worth learning, although it is less commonly used than the others. Often, twining is part of the finishing process for rugs, as it serves as a warp and weft protector.
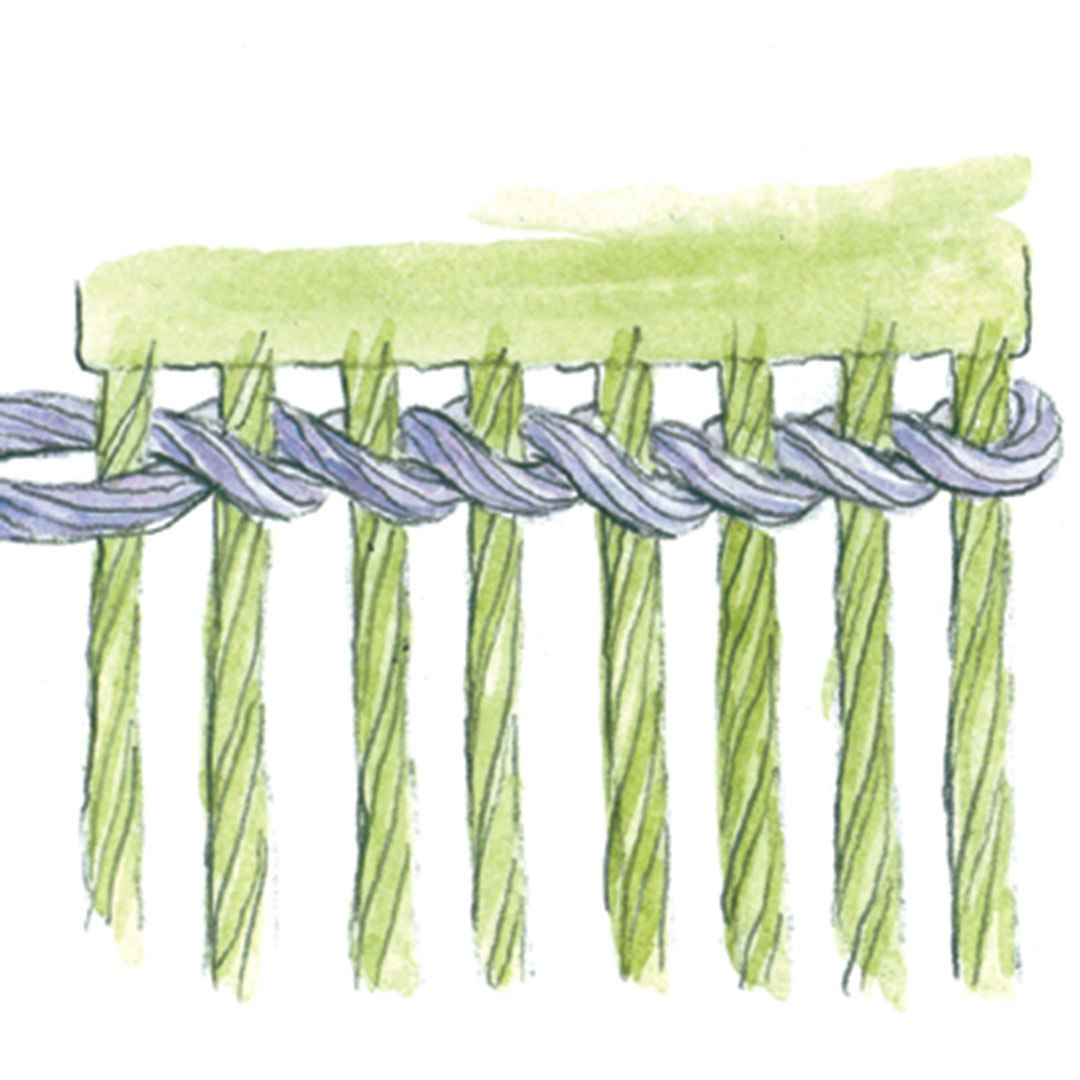
Twining is a technique that you can do on or off the loom. Illustration by Ann Swanson
Elisabeth used the technique off-loom for the Halcyon Yarn Team Colors Away Scarf, but you can use the technique on any of the scarves on or off the loom. Here are the steps for twining the ends of a scarf:
- Cut a strand of yarn that is about 22” long for each row of twining you want to do. Fold the strand in half.
- Place one strand of the twining yarn below the first two warp ends and the other strand above the same two warp ends so that the fold is snugged up against a selvedge thread.
- Bring the strand that is below the warp up and forward two ends. Bring the strand that is above the warp down and forward two ends.
- Continue this over/under pattern across the warp. When you have completed a row of twining, use your fingers or a comb to push it into place next to the weaving.
- When you get to the end of the warp, you can either turn around and go back the other way or secure the tails within the twining and then clip them.

Susan's lashed scarf. Note the twill tape template on the right. Photo by Susan E. Horton
I want to hem the scarf I'm working on for my husband, which you can see above, so I lashed onto the front beam and used thinner thread to weave the underhem portion.
Always finish your weaving thoughtfully and think about your finish before you start. You will be happy you did.
Weave well,
Susan