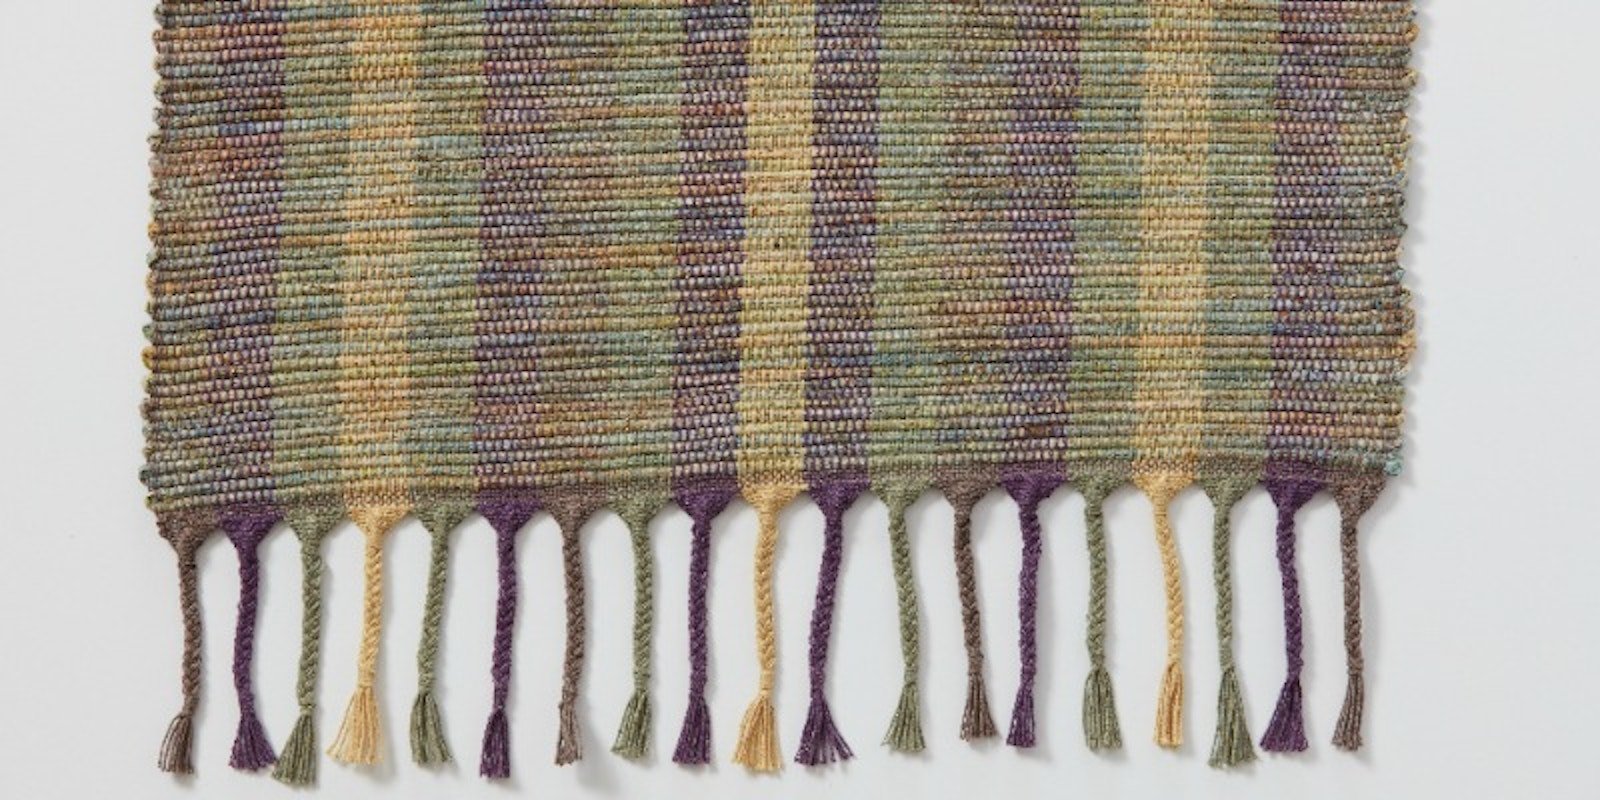
Tom Knisely is a man after my own heart. We both find joy in planning projects, but not so much in the finishing of them. For the article on fancy finishes in Handwoven May/June 2017, however, Tom went above and beyond and wove a rug with an extra special finish. In his Notes from the Fell article, Tom explains his design process. Here’s an excerpt from that article. —Christina
I love planning a project from the beginning and warping my loom. I know this sounds crazy, but I probably enjoy planning and warping more than the weaving itself. When the woven project starts to resemble the idea I have in my head, I am ready to move on and start the next one. Therein is my justification for having multiple looms: I need them. When I’ve finished weaving a piece, I stabilize the ends by weaving in some waste material, remove it from the loom, and then clean up the loom so I can re-warp. I sometimes leave projects unfinished for weeks on end before going back and tying knots for fringe or rolling hems. Finishing is my least favorite part of the weaving process. I admit it. For me, it’s much the same as cleaning up the kitchen after a marvelous meal. Fun to cook and make the mess, but all those dishes afterwards—Ahhhh!
Tom’s “Rag Rug with a Triple Finish” features a Damascus edge, V-shaped braids, and 3 strand braids.
For most of us, there are several standard finishes that we turn to over and over again: simple overhand knots for a fringed edge, a hemstitched edge done on the loom under tension, twisted fringe, and rolled hems. For many of my projects, finishing is an afterthought. Any consideration of finishing comes in the very beginning when I must decide if the project will have fringe or a rolled hem. This determines where I start the first pick, either close to the front tie-on for a hemmed piece, or a bit further up the warp for one that is fringed.
This project started with a phone call from Anita Osterhaug asking me to weave a mat with a Damascus edge. I mulled over a few ideas in my mind and then decided to go one step further and, after completing the Damascus edge, tie a finish that I had seen on Oriental rugs. It was a finish Peter Collingwood showed me years ago and one that I hadn’t done much of because of the time it takes.
Even though finishing is my least favorite part of the weaving process, I decided to make an exception for this rug. On page 149 of Peter’s book Rug Weaving Techniques: Beyond the Basics is a wonderful illustration of the braid I learned from Peter. The braid requires an odd number of ends in each group. It is made by isolating the center thread and then working a series of half hitches from each side and wrapping around this center thread. The result is a V-shaped braid.
I usually sett 8/4 carpet warp at 12, 16, or 24 ends per inch depending on the project, but this time, for ease of calculation, I used a 15-dent reed and a width of 19 inches, giving me the perfect setup to make nineteen of those awesome V-shaped braids per end. Planning the warp length was a little tricky. I usually follow the conventional methods for planning warp length, but this project was different because I had a limited amount of rags to weave with—just a bit over 2 yards. The quantity of rag weft was my deciding factor as to how long the runner would be. In other words, I took a seat-of-the-pants approach.
Tom Knisely
To find out more about this finishing technique and to learn how to weave Tom’s rug check out the May/June 2017 issue of Handwoven.


