I am a knitter as well as a weaver, and I have acquired a collection of knitting yarns over the years that work beautifully on a rigid-heddle loom. I’ve also developed a freeform weaving style that allows me to escape the constraints of knitting to create funky—and wearable—infinity scarves that use up the little bits of yarn that accumulate (as we all know!) over time.
DESIGN
I often use the colors in a skein of hand-dyed yarn as my initial design inspiration. After choosing the primary yarn, I pull out every yarn in my stash that complements it and put them all in a pile. Then I play around with interesting with. I don’t worry about mixing fiber types. The differential shrinkage that will occur in the wet-finishing is part of the free nature of this kind of weaving, and the yarns that shrink will create a nice wavy effect in the fabric, which suits the nature of the design. As long as the yarns are soft on the skin, they are suitable for my purposes.

Janet’s main yarn, the variegated Spectrum Fibre at center, surrounded by any and all complementary yarns from her stash.
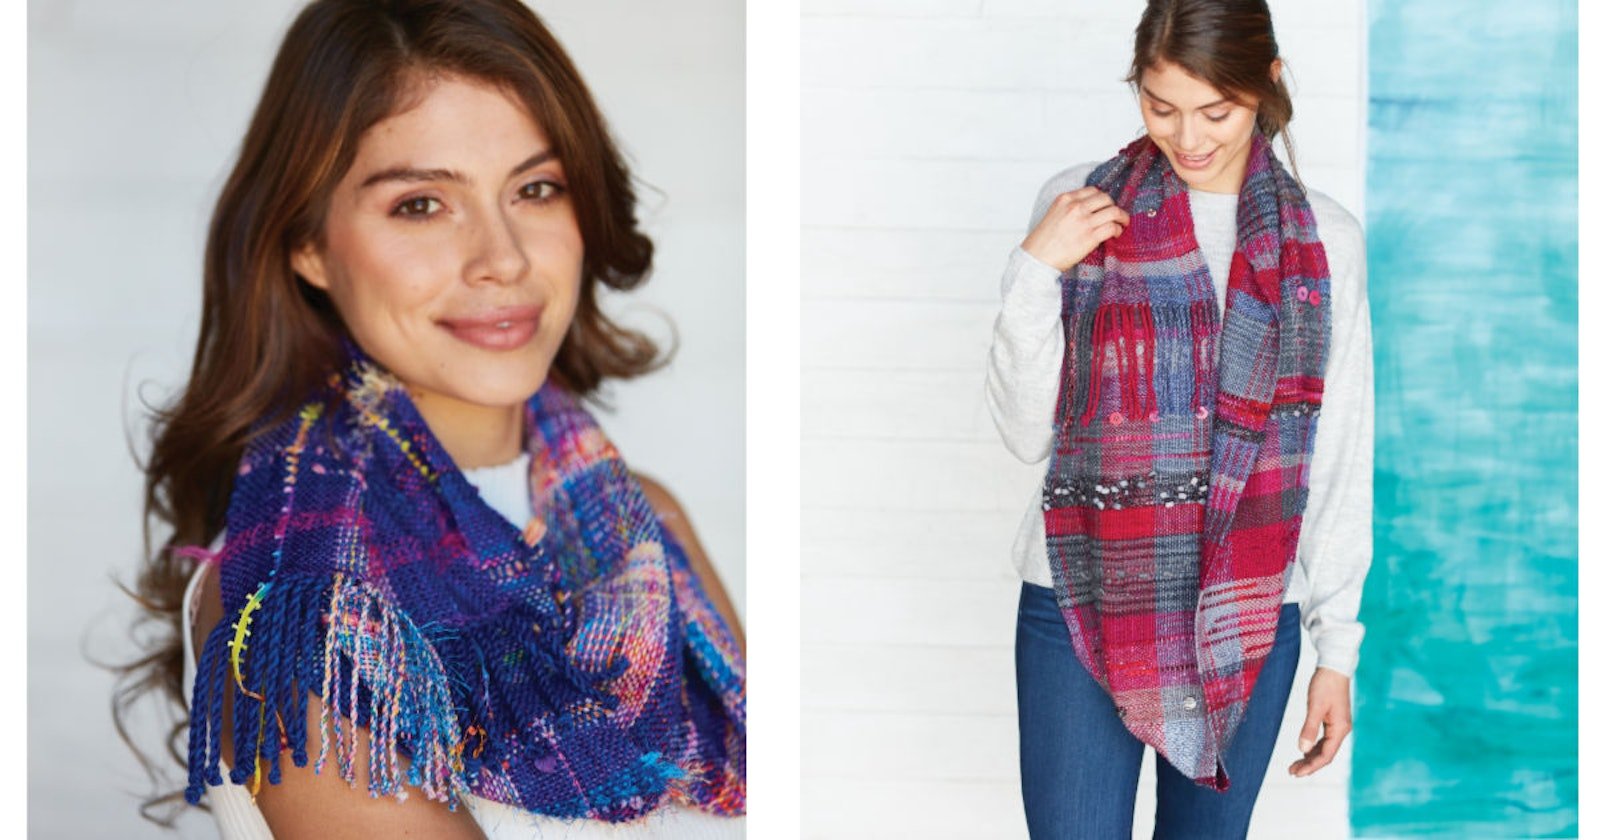
For the blue scarf pictured here, I began with a beautiful variegated fingering-weight sock yarn by indie dyer Briony Young of Spectrum Fibre in the colorway Manhattan Sunset. For the rest of my warp, I chose a blue DK-weight yarn from The Verdant Gryphon, a ladder ribbon called Eros from Herwool, and Luna ribbon yarn. After selecting my warp yarns, I settled on a 10-dent heddle. I threaded the Manhattan Sunset and The Verdant Gryphon yarns through the holes and threaded the ribbon yarns through the slots only, as abrasion in the holes would damage the ribbons. I wanted a reasonably dense weave that would capture the chunky yarns without risk of having them pull out with everyday wear. My warps are usually around 100 inches long to create infinity scarves that can be looped twice around the neck.

Janet takes a photo of the first few inches of her weft when she starts a project so she can be sure not to end her warp with the same yarn.
WEAVE
Before weaving, I prepare my weft yarns by winding fingering-weight to DK-weight yarns onto bobbins for my boat shuttle. Chunky or textured yarns are cut into pieces or wound onto my stick shuttle as needed. The only planning I do is to record or photograph the first weft yarn used because I don’t want to duplicate it at the end of the scarf. The first and last yarns woven will butt up against each other when attaching the fringe ends, and I prefer that they not be the same. I hemstitch the beginning and end of the scarf to make a decorative border for the fringe and leave enough yarn at each end (9–10 inches) for fringe.
I prefer a simple plain weave for my fabric. I like to react to the woven section in front of me without any consideration as to what I’ve woven previously. To create interest, I use contrasts: smooth with fuzzy, variegated colors with solids, hot colors with cool, chunky with fingering weight, shiny/sparkly with matte. I beat very gently to create a soft and flowing hand to the fabric. My theory is that if you love what you’re weaving in the moment, you will love the entire piece when it comes off the loom!
A few of my favorite methods for creating texture are:
- Inserting short pieces of chunky or textured yarns to break up long expanses of plain weave
- Pulling up loops of yarn before beating
- Adding flat buttons (no shanks) or beads for embellishment. I use sock yarns with some nylon content to thread through the holes in the buttons and weave into the fabric.
FINISH
After removing it from the loom, I lay the scarf flat with wrong sides together and ends aligned, weighed down with heavy books so it won’t move. I use a hair pick to comb out the yarn ends so they lie straight and then use a quilter’s ruler, cutting board, and rotary cutter to trim the warp ends to the desired length.

Hemstitched and partially knotted fringe.
Next, I knot the corresponding hemstitched bundles together (usually tied in bundles of four or six yarns) from the bottom and top layers using an overhand knot. I insert a needle into the knot loop and guide it up to the hemstitching border.
Using a fringe twister, I separate the yarns in each knotted bundle into even numbers and twist and knot the ends. I prefer not to include the ribbon yarns in the twists; they look great when left hanging free with an overhand knot at the end to prevent raveling when washed. Eyelash yarns, however, add a really fun texture to a twisted bundle!
I dab the end knots with Fray Check or Fray Block and allow them to fully dry. To wet-finish the scarf, I use scentless SOAK (a no-rinse detergent for fine yarns) in a sink of tepid water. I carefully squeeze out most of the water from the scarf and then roll it in a towel to remove excess water before letting it dry flat. I take care not to press a crease into the folded end of the scarf when laying it out to dry. Lastly, I trim loose threads and the knotted ends.
Conclusion
Follow this simple formula for weaving an infinity scarf to create wearable, artistic pieces that allow your inner child to break free. Create some interesting stripes with your warp and use literally any soft yarn for the weft. Stretch your color choices to include some you might not normally use. And most importantly, have fun!
—Janet Rice-Bredin
Note: This article first appeared in Handwoven November/December 2018 under the title "Idea Gallery: Infinity Scarves with Tied Fringe."