Every handwoven project starts with an idea, and as I said in my last post, I like to use the themes of Handwoven and Little Looms to shape my ideas. Once I have one, I need 3 additional ingredients to start turning it into a project. Those ingredients are the kind of item, the weave structure, and the yarn type. The right combination of these three factors makes a great project. Once I have figured them out, then I fill in the other blanks: yarn color, number of warp ends, warp length, setts, and yardage requirements. In this post, I will share how I approach designing a project for Handwoven.
There is no single right order to approach designing a handwoven item. Sometimes, I start with the yarn and then decide what kind of item and pattern would fit that yarn. That’s what I did for my Among the Stars pillows in Handwoven January/February 2021. The issue’s theme was “Yarns with Impact,” so it’s not surprising that my project started with a choice of yarn. It was the perfect opportunity to try out some beautiful yarn made from recycled material. With this yarn in mind, I designed two pillow covers.

Among the Stars pillows from Handwoven January/February 2021. Photo by George Boe
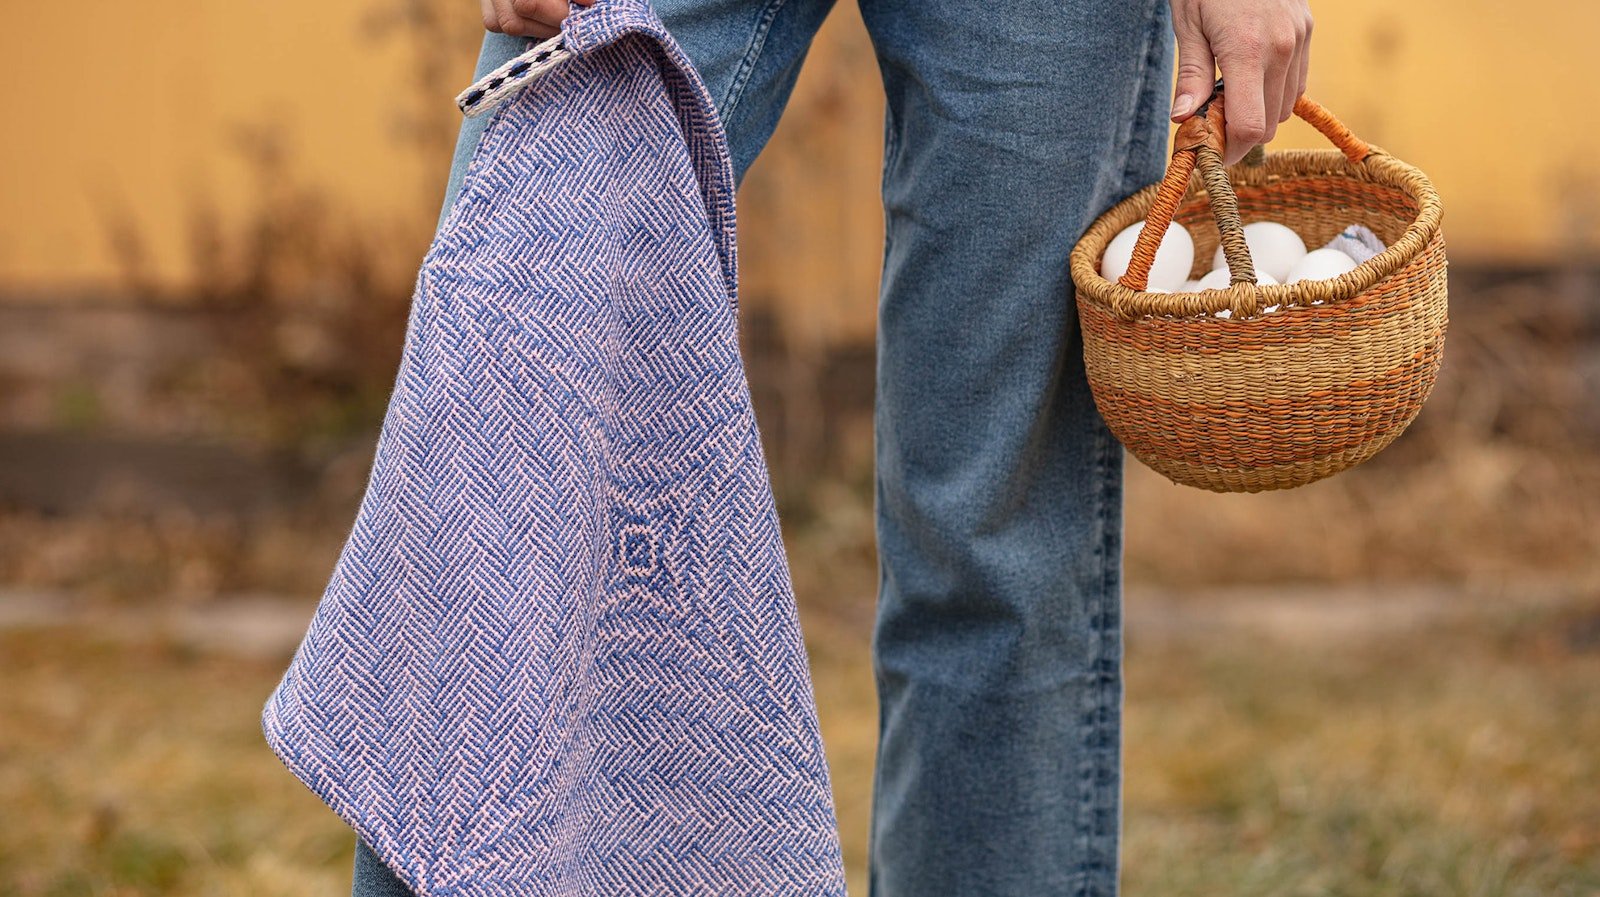
For other projects, the item type or the draft might come to me first, and then the other two ingredients come after. When designing for Handwoven, the draft usually comes first for me. This was the case for my Blossoms and Butterflies kitchen towels (pictured at top) that were in Handwoven March/April 2020.
The theme of the issue was “Flora and Fauna,” and I wanted to capture both ideas in one weaving. I developed a shadow-weave draft resembling a clover, covering the flora part of the theme. The clover was also reminiscent of butterfly wings to me. I added an extra treadling sequence in the middle between the two sets of “wings” to give the butterfly a body and ended up with two separate patterns that could be woven on one warp.
With the draft ready, I still had to choose the type of item and the yarn. It didn’t seem like making the clover and butterfly into a shawl or table runner would do justice to the design. Making two separate pieces seemed a better option. I decided to make kitchen towels when I realized that the number of warp ends in my design would make nicely sized kitchen towels using 8/4 cotton.
All the ingredients were there, and I was ready to fill in the technical blanks. I knew from the start the sett I would use based on previous experience. For other projects, the yarn might be new to me. If this is the case, I make an educated guess based on wraps per inch and look at setts other weavers have used with the same yarn. This brings me a long way, but I always advise sampling to see what you think is the correct sett for a new-to-you yarn. It can sometimes be surprising.
For the Blossoms and Butterflies project, I was lucky that the number of warp ends in my initial pattern created a width suitable for towels. Sometimes, I’m not so lucky, and I spend a lot of time tweaking the draft to fit. In those cases, I work on two variables: the full draft and the number of pattern repeats. If the draft is made up of several pattern repeats, adding or removing one or more repeats is a good way to make the project wider or narrower. If this doesn’t do the trick, I adjust the design itself by adding or removing features such as borders or motif centers. I continue this interplay of adjusting the draft and number of repeats until I have a configuration that matches the chosen yarn weight and desired width. Of course, another option would be to keep the pattern as it is and choose a yarn with a different yarn weight.
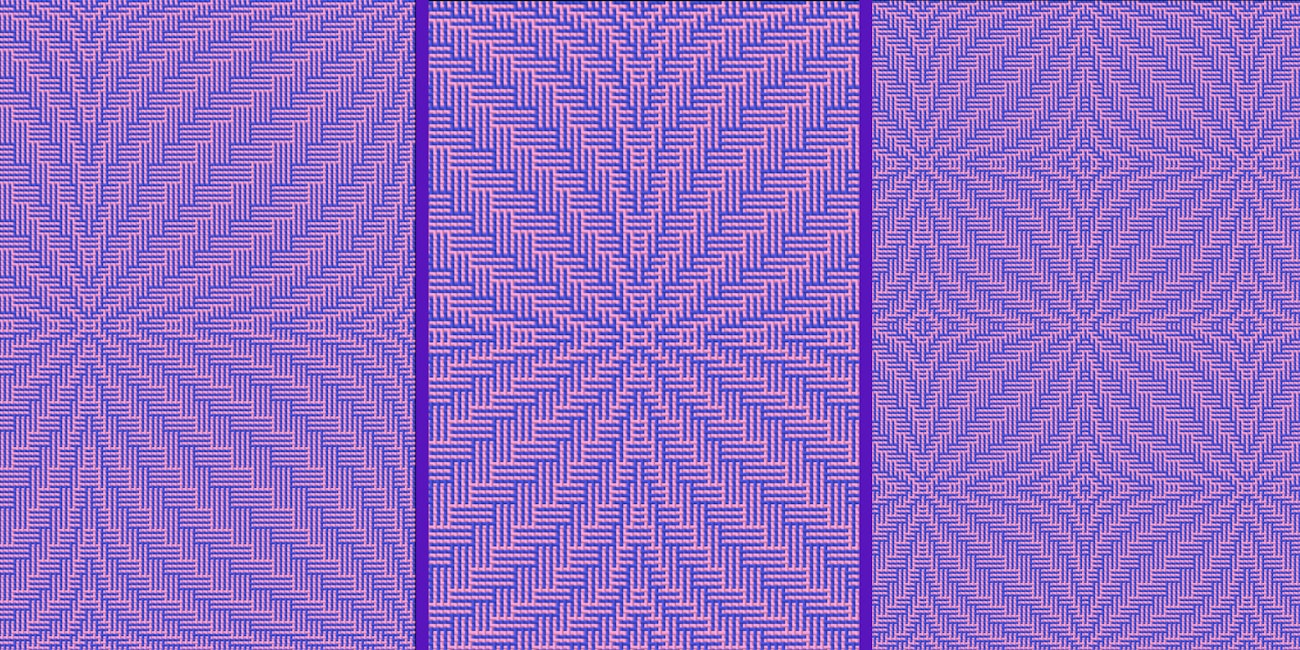
Here is an example of how I might move from a large draft to a smaller one and then use repeats of the smaller version for a new design altogether.
The next step of the towels project was choosing colors. I used input from 4 places to pick my colors:
- The issue’s color palette
- Color availability in my chosen yarn
- Weave structure requirements (e.g., for shadow weave I needed a dark and a light color in warp and weft)
- Personal preference
For my towels, I settled on light pink and dark blue, and then I was ready to calculate warp length and yardage.
I approach determining my warp length based on the total number of weft picks divided by ppi. This gives me the total length of the woven piece. Then I add about 10 percent to account for take-up and 25" to 35" for loom waste and potential sampling. The total yardage required for each warp color then amounts to the number of warp ends in that color multiplied by the calculated warp length. For the weft, I take the total number of weft picks per color and multiply it by the width of the warp in the reed. Again, I add about 10 percent for take-up and another 10 percent in case I want to sample. This gives me the total yardage required for the weft per color.
And now I’m ready to get started. After all this designing, tweaking, and calculating, it is time to pick up the yarn and start winding my warp!