One of the things unique about loom weaving is how your start dictates your end. By this I mean the warp. The warp you wind, sley, thread, and beam onto your loom is in charge. I guess this isn’t as true with tapestry weaving, but it is certainly true with other types of weaving. You can change your tie-up, your treadling, or your weft, but your width, sett, and fiber decisions in the beginning set the stage. For this doublewidth Harrisville wool blanket I decided to push the time I had with the warp at the loom by designing in the reed.
For anyone unfamiliar with the term, designing in the reed means warping from the front and placing warp stripes in the reed where you want them. For doublewidth weaving, it is especially easy to balance the warp because your stripes are usually mirrored when the piece is opened up. Even with designing in the reed, the warp is in control, but there is a certain freedom in releasing yourself from the constraints of winding a warp in perfect order on a board or otherwise.
I wanted to experiment with using two sizes of Harrisville wool (Shetland and Highland) in a blanket for a little bit of texture and for variation in stripe sizes; that is, I wanted some thin 1-end stripes. At first I tried designing it with weaving software and graph paper but got nowhere. If I had wanted simple stripes, maybe that would have worked, but I wanted striped stripes (if that makes sense), and figuring that out while thinking about doublewidth and two sizes of yarn got confusing, making designing in the reed that much more appealing.

Striped stripes made designing this blanket on paper difficult. Note how the yarn changed with wet finishing in the lower photograph. Photo credit: Susan E. Horton
I’m sure other weavers have other methods, but here are the steps I use:
- Mark the beater with tape indicating the selvedge and fold edges so that you know the borders without measuring each time you return to the loom with bouts of warp to sley.
- Start with a foundation. (I started winding my warp with solid colored stripes in the larger Highland size.) Wind 4 or 5 bouts of warp ends, and secure them with tight cinch ties. Then place the cross of each bout on lease sticks and attach them to the beater. Sley the bouts in various places across the reed. Remove the lease sticks.
- Start playing with stripe placement. Be aware of your denting so that you don’t place stripes in the wrong spots. (I started winding and sleying multiple colored stripes with both sizes of yarn, 3 or 4 bouts at a time. I sett the Highland at 16 epi (8 epi per layer), and the Shetland at 24 epi (12 epi per layer) in an 8-dent reed. For ease in sleying the reed and keeping track of heddles, I kept all bouts of Highland in multiples of 4 threads, filling 2 dents in the reed, and using 4 heddles. I designed bouts of Shetland that were multiples of 12 ends, filling 4 dents and using 12 heddles.)
- Once the reed is filled, thread the heddles as usual, and tie onto the back beam. Place your lease sticks in the warp behind the heddles. Organize your warp chains the best you can.
- Wind on a little slower than usual, cutting the many cinch ties when needed and managing the warp chains with care to eliminate tangles.
I wove large blocks of weft color to preserve the stripes but still add a little interest. After fulling in the tub, spinning out in the washing machine, and hanging to dry over a shower curtain rod, I was happy with my experiment. I like the tiny stripes and the slight difference in texture that you can feel when you pet the blanket weft-wise because of using the Shetland and Highland yarns together. In case you are thinking of weaving one, my blanket shrank from 90 inches to 70 inches in length. Sorry, I’d have to count threads to tell you the shrinkage in width!

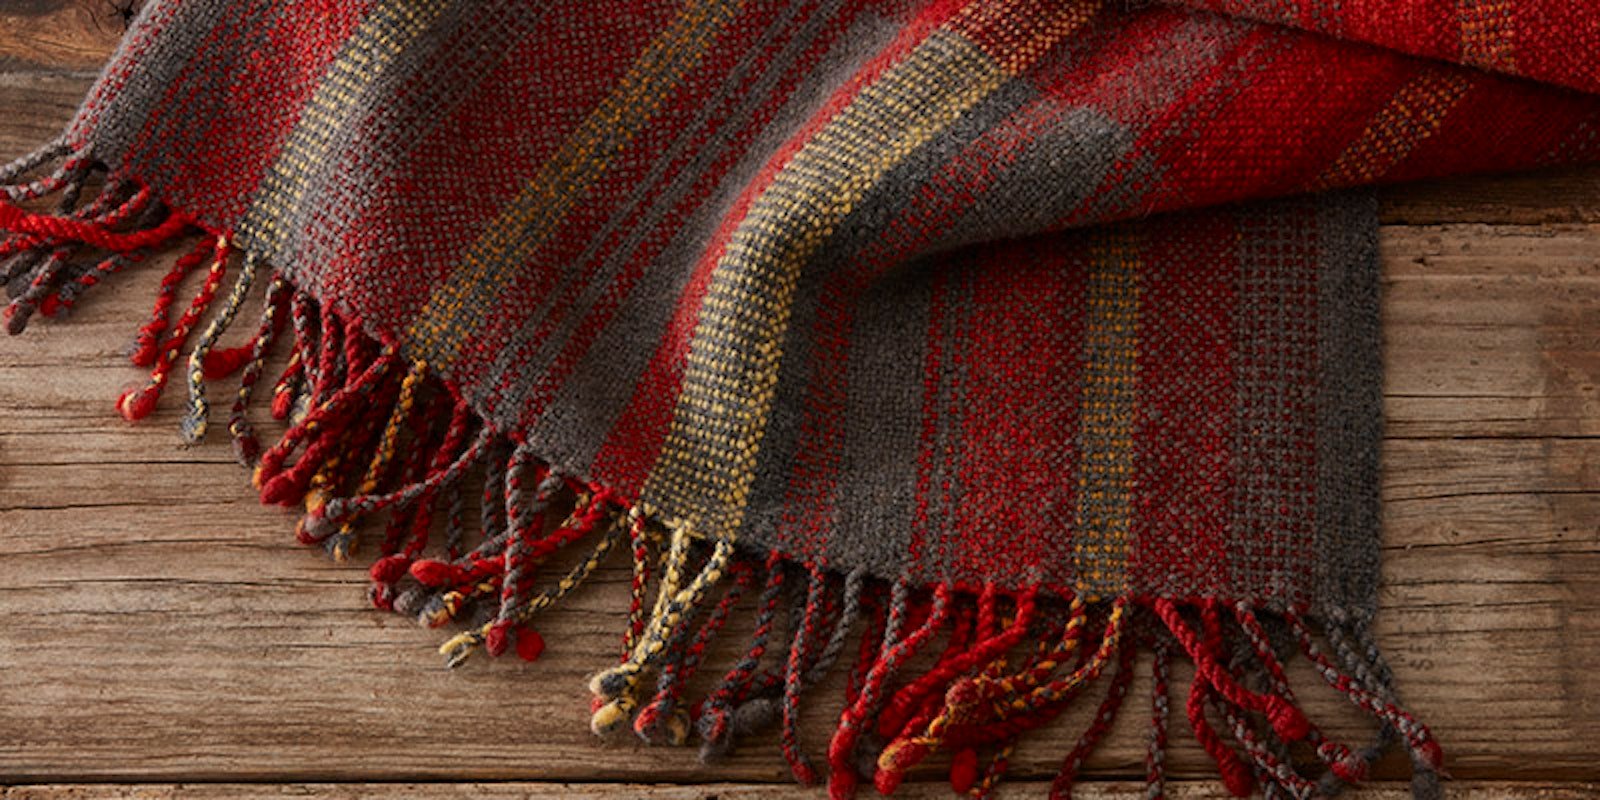
Warp colors: Cornsilk, Russet, Topaz, Mustard, Poppy and Dove Grey. Weft colors: Russet, Topaz, Poppy and Dove Grey. Photo credit: George Boe
Try designing in the reed, perhaps with doublewidth your first time to help you with balancing your stripes. It’s a great way to take a bit of control back from your warp.
Weave well,
Susan