Have you ever wanted to upcycle a thrift store sweater but didn’t know how to start? In her article for the January/February 2018 issue of Handwoven, Pam James explains how to ravel a sweater so you can use the yarn to weave, knit, or anything else you so desire. With these instructions you’ll be able to upcycle sweaters into the ultimate eco yarns. And if you’re interested in more information on weaving with recycled yarns, make sure to check out our free eBook on the subject! —Christina
I admit to being cheap—or as my sister-in-law so kindly says, “resourceful.” However, the reason I weave almost exclusively with yarns from used sweaters is that I discover all sorts of unusual textures and types of yarn. You may also find yourself drawn to upcycling, be it for environmental reasons or for converting Grandpa’s favorite sweater into a shawl you can wear.
While you might not depend upon used sweaters for all your weaving as I do, the right one might provide the inspiration or spark(le) you need for your next project. Plus, a basic long-sleeved pullover yielding four large balls of yarn will probably cost you a lot less than $10. Of course, not every used sweater is worth raveling and could, in fact, prove to be pure frustration. The first step is learning how to choose a sweater.
SUGGESTED TOOLS
-
- Sharp-pointed scissors
- Small crochet hook or seam ripper
- Ball winder

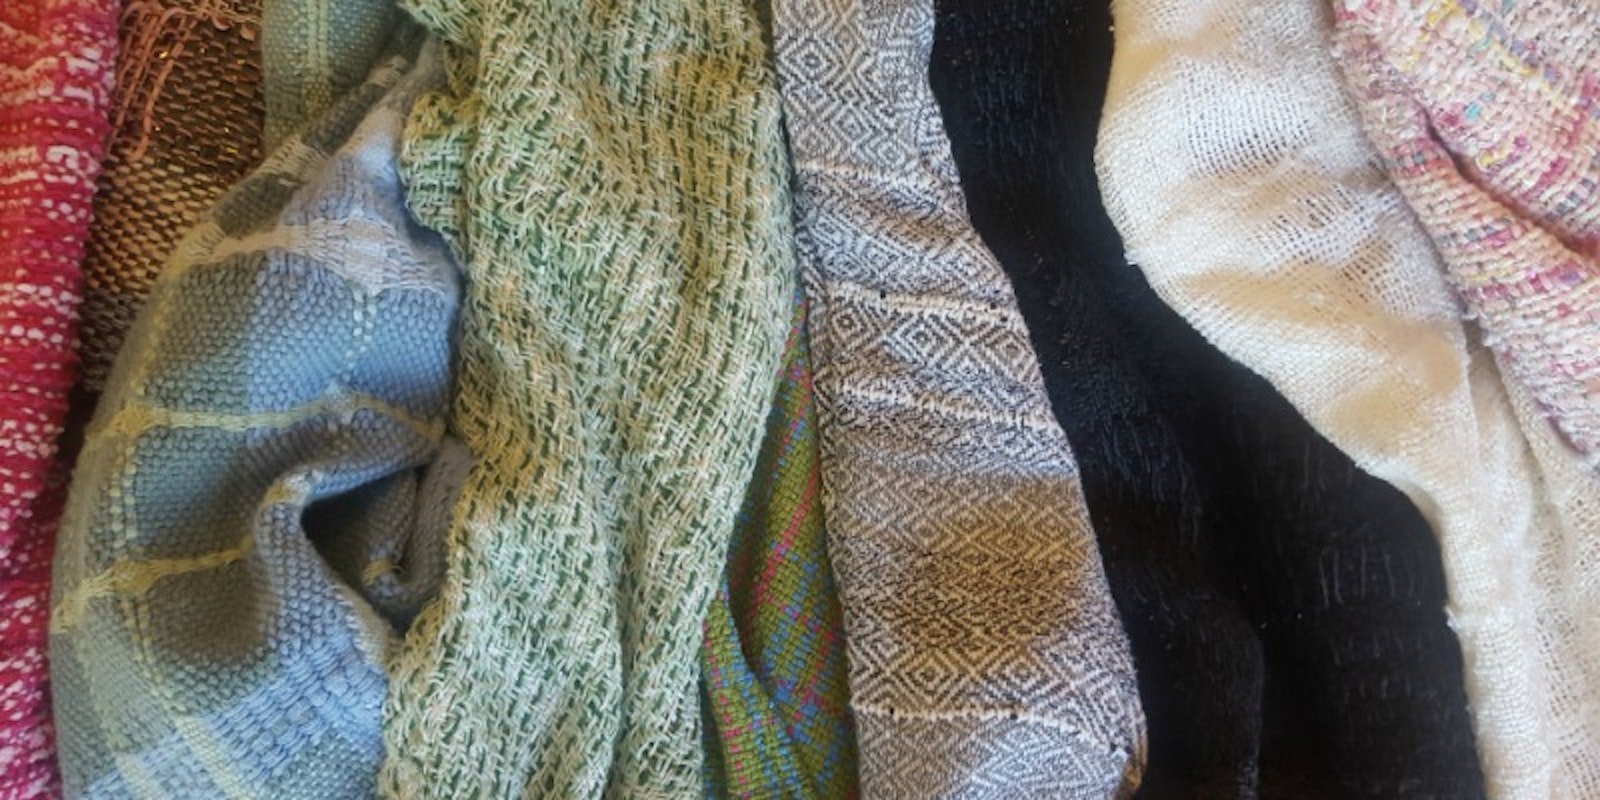
A selection of just a few of Pam’s upcycled sweater yarns.
CHOOSE THE RIGHT SWEATER
-
-
-
- Select chain-stitched seams only! Serging, used to assemble some commercial sweaters, cuts the edges, resulting in short strands when raveled. Instead, look for chain-stitched seams. The seam edges will be free and you will see clear loops on one side and a running stitch on the reverse. (Note that many sweaters will have serged shoulder seams. You do not need to reject those sweaters.)
- The best choice for raveling is any unembellished pullover. Round necks are best, but V-necks also work fine.
- As much as possible, avoid embellishments. Depending on how they are applied, you may be able to remove them, but you may also end up with yarn breakage.
- Check the men’s department. Sweaters there tend to be simpler and bigger. This is also a good place to find nice tweedy yarns.
- Beware of older items that may have felted, often a problem with wool. Check for clearly defined yarn that is not matted.
- If you find a sweater with really cool novelty yarn, metallic yarns, plied yarn, silk, or a color you can’t live without, ignore all of the above except number 1! Ultimately you are weighing the coolness of the yarn against the ease of raveling and the unbrokenness of the final yarn yield.
-
-
WASH THE SWEATER Before I begin disassembling, I wash the sweater. I don’t buy wool, so I put all the sweaters in a sink, run the hottest water I can on them, then run them through the dryer. If you do buy wool, make that a cool-water bath and air-dry the item. The goal is to see how the yarn responds to expected future washing so that there are no surprises later.
DISASSEMBLE THE SWEATER
-
-
-
- First, open the side and sleeve seams: Check the armpit, wrist, and waist for loose ends. Cutting these will often provide a thread you can pull to take apart a seam. If this doesn’t work, find the loop end of a chain and follow these steps:
- Cut the first loop. The ends of the loop will be on top of the adjoining loop.
- Slip the cut ends under the adjoining loop.
- Pull on one of the cut ends—the stitching should unchain. If it doesn’t, you may be starting at the wrong end of the chain.
- Repeat to remove the sleeves.
- If possible, repeat at the shoulder seam. If the shoulder seam is serged, start at the lowest end of the shoulder seam and cut across the top of the sweater, following a row of knitting as closely as you can.
- First, open the side and sleeve seams: Check the armpit, wrist, and waist for loose ends. Cutting these will often provide a thread you can pull to take apart a seam. If this doesn’t work, find the loop end of a chain and follow these steps:
-
-
RAVEL EACH OF THE PIECES You should now have a front, a back, and two sleeves. While you may create a round ball as you ravel, I find using a ball winder much faster. Begin raveling from the top of each section. You will frequently find one or two rows of knitting that are short strands before you find the end that will be continuous for the entire section. I start a new ball at every break so that I know that each ball is a continuous strand of yarn.
ADDITIONAL DETAILS A V-neck will frequently have a short strand that goes from the shoulder to the point of the V, with the opposite side being continuous to the bottom of the sweater. Separate neckbands or cuffs can be good short lengths to use for sampling. On rare occasions, you will find a sweater knitted with two yarns that alternate from row to row. Your best option is to wind the yarn into two balls simultaneously. Tuck the fiber content and brand label into the middle of your ball of yarn for future reference. My rule of thumb is that there will be enough yarn from any sweater to weave something approximately the same size. If you want a more accurate estimate, a yarn balance can help.
Most importantly, don’t get discouraged! Choose something easy to start with (fat yarn, easy-to-see chain stitching, and loose stitches) to get the idea. You will get better and better at choosing sweaters, and figuring out the deconstruction will become easier.
—Pam James