What do you do with all those small bits of yarn that accumulate: leftovers from knitting projects, small skeins of handspun, or that one special skein given as a gift? How do you handle short pieces of yarn that are too precious to toss but not long enough to weave an entire project? I reflected on these questions while sorting through my shelves one day. I pulled out a collection of odds and ends—yarns that seemed to coordinate but were different fibers, weights, and textures—a couple hundred yards of this, maybe 50 yards of that. I started thinking, “What would happen if I turned them into a plaid?” Plaids are not something I normally weave. Constant weft changes are not appealing to a yardage weaver like me who adores single-shuttle weaves. Still, the concept spoke to me, and I began playing around.
The first step was to determine how much of each yarn I had to work with. If I wanted to preserve a certain percentage of each of the yarns for weft to create a plaid based on the warp sequence, I had to know the yardages. Using a yarn balance and a good scale, I determined as closely as I could the actual yardage in each of the odd bits. Once I figured out the length of all the “players” (there were a dozen total), I decided to set a warp length and then see how many ends of warp I could get from each yarn’s yardage using a 60/40 split. I would use 60 percent of each put-up for warp because the loom waste needed to be accounted for, and 40 percent would be for the weft. This took some careful calculations, but it was an important step and needed to be done.

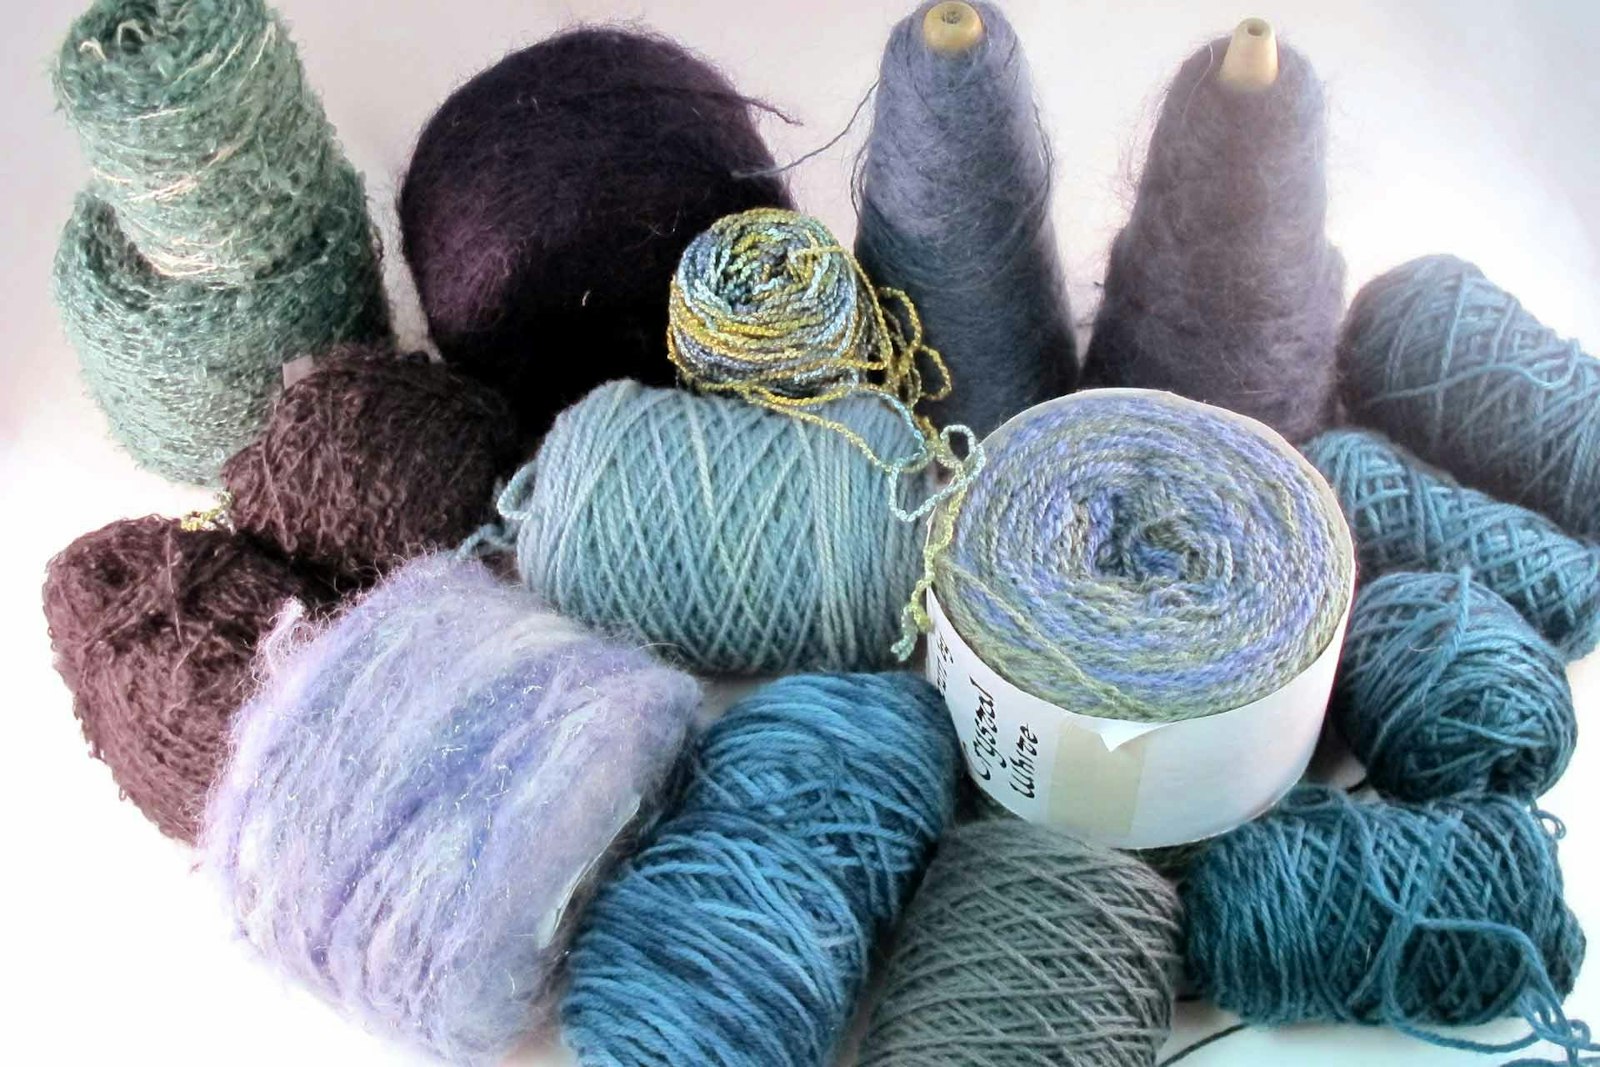
The first step is to determine what you have. Calculate carefully to figure out how many ends of each yarn can be used in a repeat.
I always make clothing from my cloth, and I know that 6 yards at 25 inches wide is the minimum yardage needed for a wearable, so I settled on a 7-yard warp 25 inches wide to give myself a little extra leeway. Careful wraps around a ruler told me that a sett of 8 ends per inch (epi) would be sufficient for twill. There were a lot of knitting wools and mohair yarns in the bunch, so this was basically a good guess.
Fortunately, weaving software made the next step of designing a plaid much easier than the first step. By assigning a color to each of the “players,” I built a striped warp that repeated itself based on how many ends of each yarn I had to work with. It was easy to see what the end result would look like by plugging the warp color sequence into the treadling sequence.
Once satisfied with the draft, I started to wind the warp. This was a slow process because I was constantly changing yarns, but it was lovely to see the warp build and to see all those odd bits and pieces that had been languishing around my studio come to life.

By assigning each yarn a color, a good simulation of the finished plaid can be generated using basic weaving software. Daryl used Fiberworks PCW for her project.
Dressing the loom with 7 yards at only 8 epi was a joy. I warped front to back, so it was easy to find any mistakes before beaming.
Fairly quickly, I abandoned trying to navigate 12 stick shuttles. With a width of only 25 inches, I found it was easier and quicker to simply reach through the shed with small balls or butterflies of the weft yarns. To be honest, I assumed that this would be one of those projects that would sit on the loom for the next five years until I needed the loom for something else, so I was really surprised by how much I enjoyed it. Weaving a plaid is like weaving a motif: it’s best not to stop until you finish the rotation. In this case, each rotation was a substantial amount of weaving. Within a week, the knots were coming around the back beam. Unlike throwing a single shuttle back and forth for 8 to 10 yards of fabric, my normal cloth configuration, this pattern required me to pay attention and follow a sequence. It was entertaining, and I finished each rotation in a sitting.

Left: By taping a small snip of each yarn to the draft, winding the repeat will go more smoothly with fewer mistakes. Right: At only 8 ends per inch, threading and beaming this warp was a breeze. (Pictured: The Harrisville Tensioning System.)
I carefully kept the plaid square, knowing that ultimately the yardage would become clothing. From years of experience, I can tell you that matching weft changes in yardage, for side seams and areas like a center back, is really tough, no matter how skilled you are as a weaver.
I ran out of weft for a couple of the yarns, but I easily found substitutes to finish the project. My loom has little loom waste for its size, and in retrospect, I should have used a split closer to 55 percent warp and 45 percent weft. Nevertheless, I pulled the yardage off the loom with a big smile.
The entire yardage, wools and all, went straight into the washing machine on gentle cycle with cool water. I knew that not all the yarns would shrink at the same rate, but because there was a frequently repeated sequence, and no one yarn dominated within the piece, I figured the shrinkage would be even. I was not wrong; the fabric after wet-finishing was smooth.

Left: A classic coat from a classy fabric, companion camel-hair side panels helped make good use of the narrower handwoven fabric and kept matching of the plaid to a minimum. Right: Beat carefully to keep the plaid square and be sure to wash the yardage when it comes off the loom.
I did not sit on the yardage for long. I decided to make a coat with a classic design using a pattern from Burda Style magazine from March 2002, one with side panels of contrasting fabric. The side panels reduced the fabric width I needed and allowed me to cut a full coat back from my fabric. They also eliminated the need to match the plaid at the sides, though I will say that I was surprised at how well the plaid matched at the front. I used epaulettes of the same contrasting fabric, a navy camel hair from my stash, so I would not have to match the plaid at the shoulders.
Every time I wear this coat, I remember each of the projects I made with the yarns that went into the plaid. I remember the skein of handspun I was given for my birthday and the lovely aqua wool gifted from another generous friend. I also remember my trip to Tender Buttons in New York City (now gone, sadly) to get the perfect passementerie buttons for the bound buttonholes. This coat is a diary of past projects and good times. Like all things that come from our hands, it is a perfect blend of life history and skills.