
Not long after weaving my mini pin-loom pumpkin (and by not long, I mean within 5 minutes), my oldest asked me, very kindly, for another pumpkin—a bigger one this time. I had so much fun weaving the first pumpkin that I, of course, said yes. This time, though, I wanted to do things a little differently.
First, I bought some yarn in a pinky-orange to make a fairytale pumpkin (also known as a Cinderella pumpkin). If you’re not familiar with this French heirloom variety, they tend to be flatter and come in the most beautiful shades, including a blush pink. They are my favorite pumpkins and the ones I search out every year at the pumpkin patch.
Second, I decided to use a new joining technique I learned from the Easy Weaving with Little Looms Holiday 2021 issue. In her project, Child’s Basketweave Capelet, Jennifer Chapman joined her pin-loom rectangles together on the loom. The result is a “wrong” side with ribbing down the seam and a clean, perfectly flat “right” side—in my opinion it looks downright quilterly.

Using the on-loom joining technique results in a ribbed “wrong” side (top) and a flat “right” side (bottom). Photo credit: Christina Garton
The aesthetics of a clean join are initially what made me want to try this new technique, but I soon found that it had an added benefit of being much faster than the typical whipstitch or double overcast. How so? Well, first, you can join multiple squares together in one go. I followed Jennifer’s instructions on joining for her capelet, which allowed me to join 3 squares together at the same time.
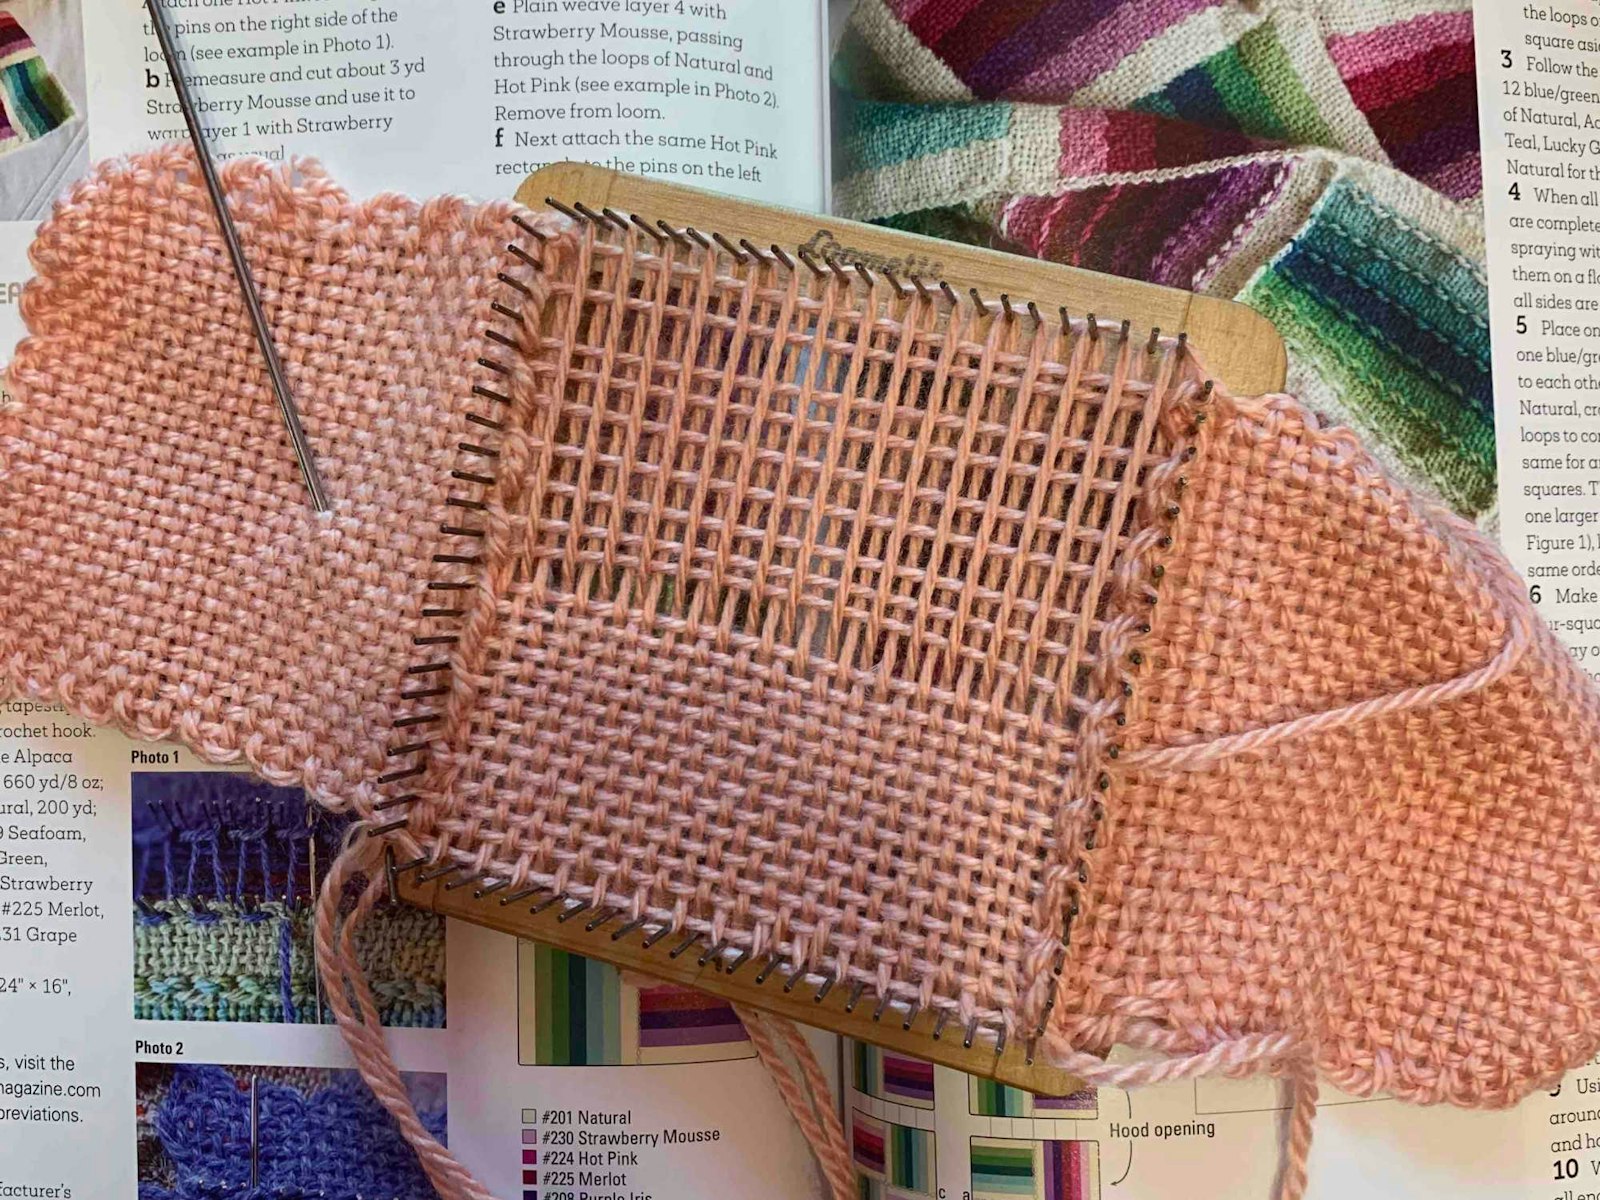
Also, the joining is part of the weaving process. Here's what I did:
- After weaving the first two squares I measured out the yarn I needed for my third square and cut it from my put-up.
- I wound the first layer of yarn on the pin loom as normal, and then I attached the two woven squares to either side of the pin loom.
- Then, when I wound the second side-to-side layer, I used a small tapestry needle to pull through the loops of the finished squares on either side.
- The third layer was then wound as normal.
- For the final side-to-side weft layer, I made sure to catch the edges of the woven squares as I went back and forth.
In case this description isn't enough, take a look at the photo below showing how Jennifer combined her pin-loom woven rectangles.
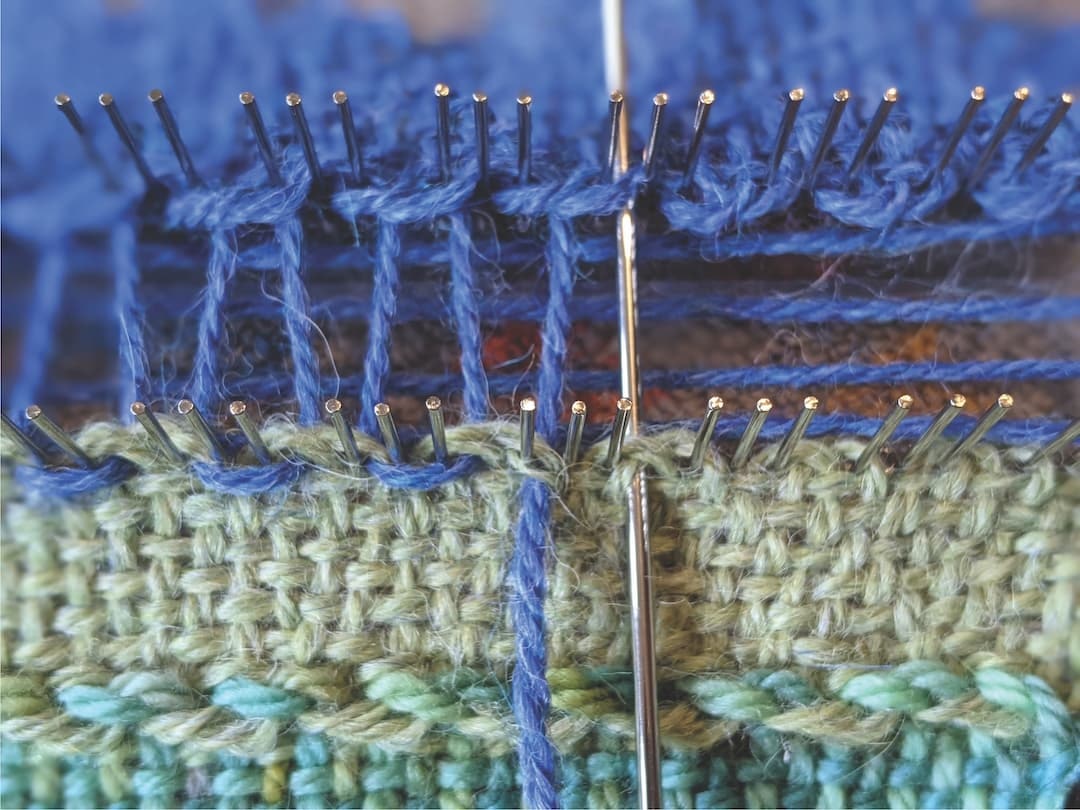 Jennifer joining pin-loom pieces on the loom. Photo credit: Jennifer Chapman
It takes a couple of extra steps beyond weaving a square as normal—pre-measuring the yarn from the start, using a tapestry needle in layer #2—but the process was still much faster than any other join technique I’d used in the past. The results look great, too. I still have 9 more squares to weave and join, and I plan to use this technique for all of them. I plan to add this technique to my regular repertoire.
If you want more information about this technique, check out the Little Looms Holiday 2021 issue. Not only will you find Jennifer’s project but also an article by Gabi van Tassell showing four more pin-loom joining techniques (that also work equally well for rigid-heddle woven cloth).
Happy Weaving!
Christina